The Complete Guide to Angel Food Cake: 5 Best Baking Tips
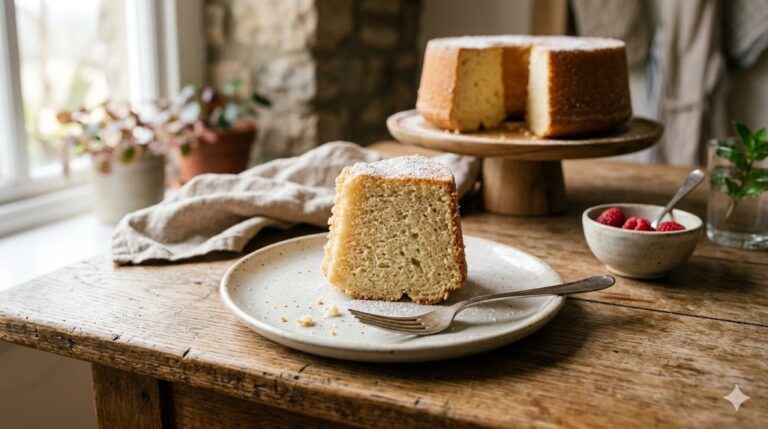
Did you know that a traditional angel food cake relies on exactly 0% fat for its structure, meaning that mastering the aeration of egg whites is 100% responsible for your baking success? This astonishing data point challenges the common belief that all great cakes require butter or oil to be moist, rich, and delicious. Welcome to The Complete Guide to Angel Food Cake, where we uncover the delicate science and straightforward techniques needed to master this ethereal, cloud-like dessert. Whether you are a novice or a seasoned pro stepping into the world of baking cakes for beginners, creating the perfect light and fluffy crumb is entirely within your reach.
Quick Answer
For the perfect angel food cake, whip room-temperature egg whites with cream of tartar until soft peaks form, gradually add super-fine sugar, and gently fold in sifted cake flour. Always bake in a completely ungreased tube pan and cool the cake upside down to prevent it from collapsing.
Ingredients List
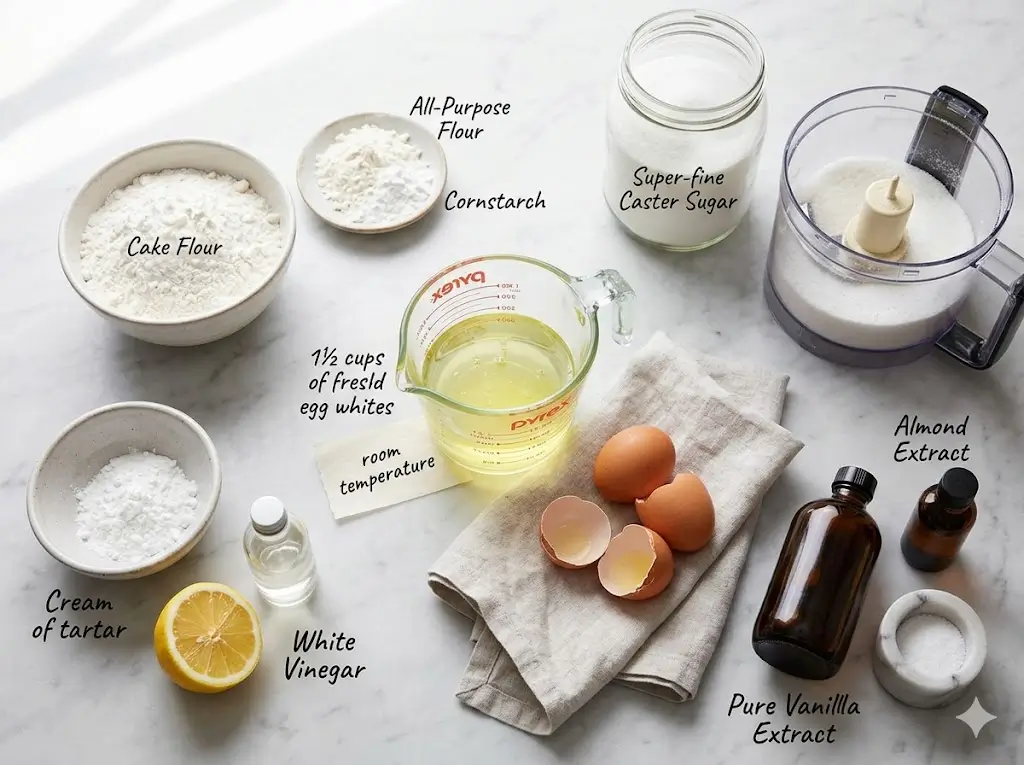
Creating a towering, cloud-like dessert requires a precise balance of specific ingredients. Understanding your components is the first step in mastering the cake ingredients guide and science of baking.
- 1 ½ cups Egg Whites (about 10-12 large eggs): The absolute foundation of your cake. They must be fresh and at room temperature for maximum volume. Substitution: Avoid carton egg whites, as they are pasteurized and often will not whip to the correct volume.
- 1 cup Cake Flour: Low in protein, cake flour ensures a tender, melt-in-your-mouth texture. Substitution: If you don’t have cake flour, measure 1 cup of all-purpose flour, remove 2 tablespoons, and replace them with 2 tablespoons of cornstarch. Sift together five times.
- 1 ½ cups Super-Fine Sugar (Caster Sugar): Dissolves easily into the egg whites without weighing them down. Substitution: Pulse regular granulated sugar in a food processor for 30 seconds.
- 1 ½ teaspoons Cream of Tartar: An acidic ingredient that stabilizes the egg whites, preventing them from weeping or deflating. Substitution: 1 ½ teaspoons of fresh lemon juice or white vinegar.
- 1 teaspoon Pure Vanilla Extract: Adds that classic, warming aroma.
- ½ teaspoon Almond Extract: Provides a signature bakery-style flavor profile that elevates the sensory experience.
- ¼ teaspoon Salt: Enhances all the flavors and balances the sweetness.
Timing
Baking an angel food cake requires patience, but the active preparation is surprisingly swift. Here is the breakdown of the time you will need to invest:
- Prep Time: 25 minutes (includes separating eggs and sifting dry ingredients)
- Cook Time: 40 to 45 minutes
- Cooling Time: 120 minutes (Mandatory upside-down cooling)
- Total Time: 3 hours and 10 minutes
Data Insight: While the total time seems long, the active hands-on time is roughly 25 minutes, which is 20% less active time than the average complex layer cake recipe that requires making and applying buttercreams!
Equipment to Baking This Recipe
Having the right tools is non-negotiable for this specific dessert. If you want to dive deeper into kitchen gear, check out our essential cake baking tools guide.
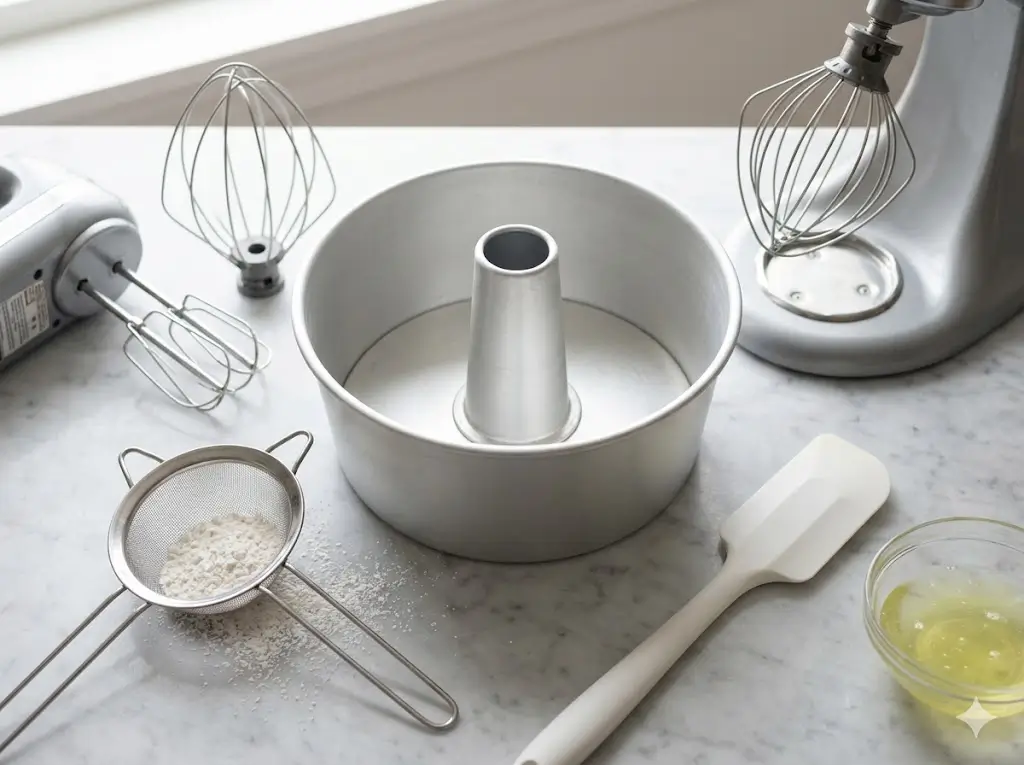
- 10-Inch Tube Pan: This must be a traditional, two-piece aluminum pan without a non-stick coating. The batter needs to physically grip and climb the sides of the pan to rise.
- Stand Mixer or Hand Mixer: Essential for whipping the egg whites to the perfect peak stage.
- Fine Mesh Sifter: Crucial for aerating the cake flour.
- Large Rubber Spatula: Needed for the delicate folding process.
Step-by-Step Instructions
Follow these instructions carefully to incorporate the best cake baking tips and techniques into your routine.
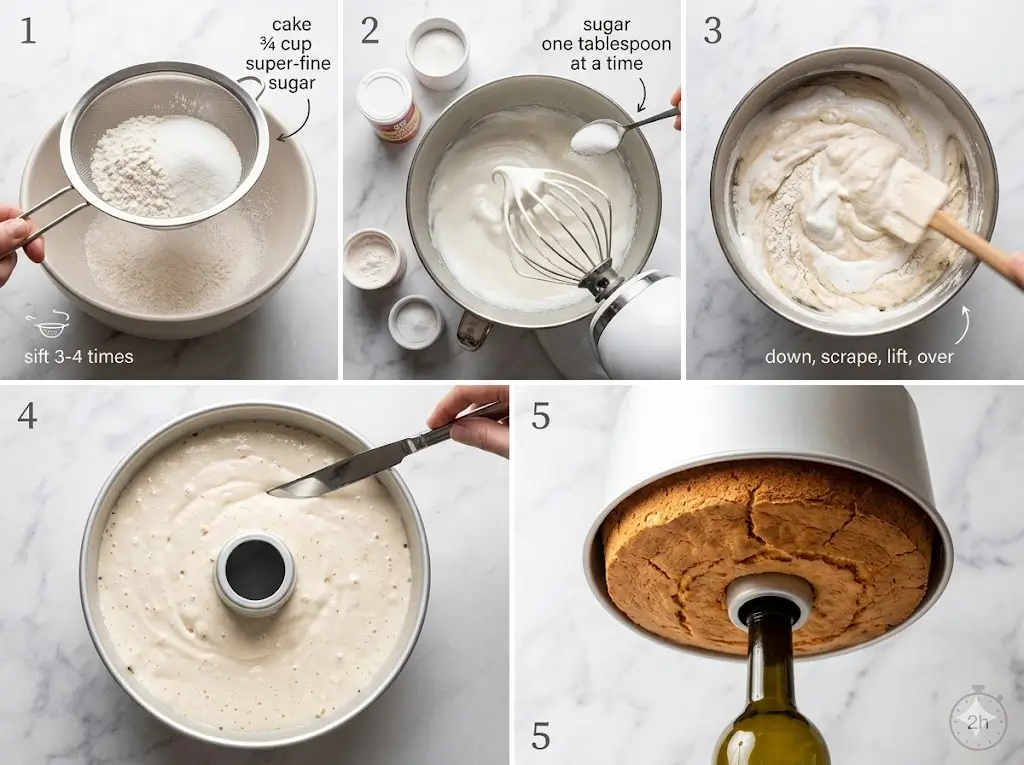
Step 1: Prep and Sift
Begin by preheating your oven to 325°F (163°C). Take your 10-inch tube pan and ensure it is meticulously clean and absolutely dry. Do not grease it under any circumstances! Next, sift your cake flour and half of your super-fine sugar (¾ cup) together in a bowl. Sift this mixture three to four times. This repeated sifting aerates the flour, making it light enough to fold into the delicate meringue without instantly deflating it.
Step 2: Whip the Egg Whites
In the pristine, grease-free bowl of your stand mixer fitted with the whisk attachment, add the room-temperature egg whites, salt, and cream of tartar. Beat on medium-low speed until the mixture becomes frothy and opaque. Increase the speed to medium-high and begin adding the remaining ¾ cup of sugar, one tablespoon at a time. Take your time here. Continue to whip until “soft peaks” form. The peaks should gently flop over when you lift the whisk. Do not whip to stiff, rigid peaks, or your cake will be dry and difficult to fold. Beat in the vanilla and almond extracts during the last few seconds.
Step 3: Fold the Flour
Remove the bowl from the mixer. Sprinkle about one-quarter of the sifted flour/sugar mixture over the whipped egg whites. Using your large rubber spatula, gently fold the mixture together. Cut down the center of the bowl, scrape along the bottom, and lift the batter up and over. Rotate the bowl slightly with each fold. Repeat this process until all the flour is incorporated. Stop folding the exact moment no more white flour streaks remain; over-mixing is the enemy of a fluffy cake.
Step 4: Bake
Gently spoon the delicate batter into your ungreased tube pan. Run a butter knife or an offset spatula through the batter in a circular motion to release any large, trapped air bubbles. Smooth the top gently. Bake on the lowest rack of your oven for 40 to 45 minutes. The cake is done when it is a deep golden brown, springs back quickly when lightly touched, and deep cracks appear on the surface.
Step 5: Cool Upside Down
This is the most critical step. The moment you remove the cake from the oven, immediately invert the tube pan. Most traditional tube pans have little “feet” or prongs to rest on. If yours does not, invert the center tube over the neck of a heavy glass bottle (like a wine bottle). Let the cake cool completely upside down for at least 2 hours. Gravity will stretch the crumb as it cools, setting the structure so it doesn’t collapse into a dense disk. Once completely cool, run a thin knife around the edges to release it.
Nutritional Information
Angel food cake is unique in the pastry world because it contains zero egg yolks and zero added fats (no butter or oil). Here is an overview of the nutritional profile per slice (assuming 12 slices per cake). For a deeper dive into how bakers manipulate these numbers, explore cake baking formulas and ratios.
- Calories: 140 kcal
- Carbohydrates: 32g
- Protein: 4g
- Fat: 0g
- Cholesterol: 0mg
- Sodium: 115mg
- Sugar: 24g
Data Insight: With 0g of fat and zero cholesterol, angel food cake has 75% fewer calories from fat compared to a standard slice of vanilla pound cake, making it an incredibly heart-healthy dessert option.
Healthier Alternatives for the Recipe
While naturally low in fat, this recipe is quite high in refined carbohydrates. If you want to modify this classic while exploring a complete guide to cake types, consider these alternatives:
- Lower Sugar Option: You can replace up to half of the super-fine sugar with a specialized baking stevia or monk fruit sweetener blend. Be warned, sugar provides structural stability to the meringue, so replacing all of it will result in a flatter, denser cake.
- Gluten-Free Swap: Substitute the traditional cake flour with a high-quality, 1-to-1 gluten-free baking flour blend that contains xanthan gum. Sift it an extra time to ensure it is incredibly light before folding it into your egg whites.
Serving Suggestions
A slice of angel food cake is a blank canvas. For visual inspiration, you can look into our cake decoration for beginners guide, or if you want to get truly creative, check out our advanced cake decorating guide.
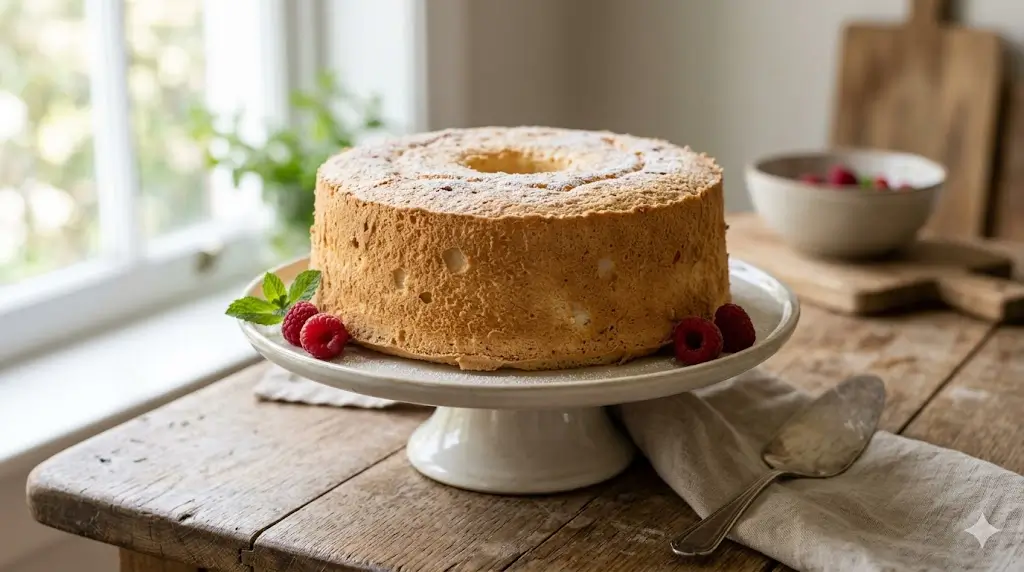
- The Classic: Serve with a generous dollop of unsweetened whipped cream and a medley of fresh macerated berries (strawberries, blueberries, and raspberries).
- Citrus Burst: Drizzle individual slices with a tart, homemade lemon curd and a dusting of powdered sugar. The acidity of the lemon cuts beautifully through the sweet meringue flavor.
- Toasted: For a unique textural experience, slice leftover cake and toast it lightly in a skillet with a tiny spray of coconut oil. Serve warm with a scoop of vanilla bean ice cream.
Common Mistakes to Avoid
Even experienced bakers can stumble with this delicate recipe. If you run into trouble, consult our guide on common cake problems and how to fix them. Here are the top pitfalls:
- Greasing the Pan: As mentioned, if you grease the pan, the batter will slip right down the sides rather than climbing up to create that tall, impressive structure. Always use an ungreased aluminum pan.
- A Speck of Yolk in the Whites: Egg yolks contain fat. Even a microscopic drop of yolk will prevent your egg whites from whipping to their full volume. Separate your eggs carefully in a separate bowl before adding them to your main mixing bowl.
- Over-whipping to Stiff Peaks: Whipping the whites until they are dry, clumpy, and rigid will make folding the flour nearly impossible without deflating the batter. Aim for glossy, soft-to-medium peaks.
Storing Tips for the Recipe
Because this cake lacks fat, it can dry out very quickly if not stored properly.
- Room Temperature: Wrap the completely cooled cake tightly in plastic wrap or place it in an airtight cake dome. It will stay fresh and soft at room temperature for up to 3 days.
- Freezing: Angel food cake freezes exceptionally well! Wrap the entire cake (or individual slices) tightly in a double layer of plastic wrap, then a layer of aluminum foil. Freeze for up to 3 months. Thaw at room temperature for a few hours before serving. Pro Tip: Do not store this cake in the refrigerator, as the cold, circulating air will rapidly draw out its moisture, leaving it stale and spongy.
Conclusion
This classic, fat-free dessert relies on properly whipped egg whites, sifted cake flour, and inverted cooling to achieve its signature airy texture. By following these precise steps and avoiding common pitfalls, you can consistently bake a beautifully tall, tender, and delicious treat every single time.
Ready to bake? We invite you to try this recipe in your own kitchen! Share your baking success in the comment section below, leave a review, and be sure to subscribe to our blog for weekly updates. For even more culinary inspiration, don’t miss our ultimate guide to cake recipes.
FAQs
1. Can I make this without a tube pan?
It is highly discouraged. A traditional bundt pan will not work because the non-stick coating and ornate curves prevent the cake from rising, and you cannot invert a standard cake pan to cool. If you must, you can try baking the batter in an ungreased 9×13 inch metal pan, though the texture and bake time will vary drastically.
2. Can I use liquid egg whites from a carton?
No. Carton egg whites undergo a pasteurization process that alters the proteins, making it incredibly difficult to whip them into the stable, voluminous meringue required to lift this cake. Always use fresh eggs.
3. Why did my cake collapse after I took it out of the oven?
The most common reasons for a collapsed cake are under-baking or failing to cool the cake upside down immediately. The hot cake structure is incredibly fragile and needs gravity to hold it in place while the starches and proteins cool and set.
4. What should I do with all the leftover egg yolks?
Don’t throw them away! You can use your 10 to 12 leftover yolks to make homemade lemon curd (which pairs perfectly with this recipe), rich ice cream bases, hollandaise sauce, or a decadent crème brûlée.
5. How do I know when the egg whites have reached the right peak?
Stop the mixer and lift the whisk attachment straight up. If the egg whites form a peak that holds its shape at the base but gently curls over at the tip (like a bird’s beak), you have reached soft/medium peaks. If it stands straight up like a spike, it is over-whipped.
The Complete Guide to Angel Food Cake: 5 Best Baking Tips
Ingredients
Equipment
Method
Step 1: Prep and Sift
Begin by preheating your oven to 325°F (163°C). Take your 10-inch tube pan and ensure it is meticulously clean and absolutely dry. Do not grease it under any circumstances! Next, sift your cake flour and half of your super-fine sugar (¾ cup) together in a bowl. Sift this mixture three to four times. This repeated sifting aerates the flour, making it light enough to fold into the delicate meringue without instantly deflating it.Step 2: Whip the Egg Whites
In the pristine, grease-free bowl of your stand mixer fitted with the whisk attachment, add the room-temperature egg whites, salt, and cream of tartar. Beat on medium-low speed until the mixture becomes frothy and opaque. Increase the speed to medium-high and begin adding the remaining ¾ cup of sugar, one tablespoon at a time. Take your time here. Continue to whip until "soft peaks" form. The peaks should gently flop over when you lift the whisk. Do not whip to stiff, rigid peaks, or your cake will be dry and difficult to fold. Beat in the vanilla and almond extracts during the last few seconds.Step 3: Fold the Flour
Remove the bowl from the mixer. Sprinkle about one-quarter of the sifted flour/sugar mixture over the whipped egg whites. Using your large rubber spatula, gently fold the mixture together. Cut down the center of the bowl, scrape along the bottom, and lift the batter up and over. Rotate the bowl slightly with each fold. Repeat this process until all the flour is incorporated. Stop folding the exact moment no more white flour streaks remain; over-mixing is the enemy of a fluffy cake.Step 4: Bake
Gently spoon the delicate batter into your ungreased tube pan. Run a butter knife or an offset spatula through the batter in a circular motion to release any large, trapped air bubbles. Smooth the top gently. Bake on the lowest rack of your oven for 40 to 45 minutes. The cake is done when it is a deep golden brown, springs back quickly when lightly touched, and deep cracks appear on the surface.Step 5: Cool Upside Down
This is the most critical step. The moment you remove the cake from the oven, immediately invert the tube pan. Most traditional tube pans have little "feet" or prongs to rest on. If yours does not, invert the center tube over the neck of a heavy glass bottle (like a wine bottle). Let the cake cool completely upside down for at least 2 hours. Gravity will stretch the crumb as it cools, setting the structure so it doesn't collapse into a dense disk. Once completely cool, run a thin knife around the edges to release it.