
Have you ever wondered why we are instinctively drawn to the most intricately decorated cakes in a bakery window, even before we know what flavor lies beneath the frosting? Data from consumer psychology studies indicates that visual appeal accounts for nearly 90% of our initial flavor expectation; we “eat with our eyes” long before the first bite. For many, the transition from baking a delicious sponge to presenting a visual work of art feels like a daunting leap from science into fine arts. However, Cake Decoration for Beginners is not about innate talent—it is about mastering the mechanical application of stable mediums and understanding the geometry of a cake.
Whether you are looking to create a simple birthday treat or an elegant tiered centerpiece, this guide serves as your comprehensive masterclass. We will strip away the mystery of smooth finishes and sharp edges, providing you with a data-driven approach to aesthetics. By the end of this Cake Decoration for Beginners tutorial, you will possess the technical vocabulary and physical skills to transform any “Formula” from CakeFormula.com into a stunning visual statement.
The Decorative Medium: Masterclass Frosting Ingredients
In the realm of Cake Decoration for Beginners, your choice of frosting is your most critical structural decision. While many beginners default to American Buttercream due to its simplicity, it is often too sweet and prone to “crusting” prematurely. For this guide, we are focusing on Swiss Meringue Buttercream (SMBC). It is the gold standard for decorators because of its silken texture, superior stability, and ability to hold crisp lines.
The Component Breakdown for Stability
- Granulated Sugar (300g): Essential for stabilizing the egg white protein structure.
- Large Egg Whites (150g): Use fresh whites rather than carton whites; fresh proteins have stronger bonds, which are vital for a lasting “lift.”
- Unsalted European-Style Butter (450g): You must use high-fat butter (82%+) cut into 1-inch cubes. It should be “cool-room temperature”—roughly 60°F (16°C).
- Fine Sea Salt (1/2 tsp): Cuts through the fat to brighten the flavor profile.
- Pure Vanilla Bean Paste (2 tsp): Adds visual “specks” of luxury and deep flavor.
Substitution Suggestions:
- For a Vegan Option: Replace butter with a high-quality vegetable shortening/vegan butter block mix (50/50 ratio) and use aquafaba (chickpea brine) instead of egg whites.
- For High Humidity: If you are decorating in a hot climate, substitute 100g of the butter for high-ratio shortening to raise the melting point of your frosting.
Timing: The Patience of the Decorator
One of the biggest pitfalls in Cake Decoration for Beginners is rushing the thermal stages. Decorating a cake that is even slightly warm will result in “frosting slide,” a catastrophic failure where the butter melts and the structure collapses. This decorating process requires approximately 110 minutes, which is 30% more time than a standard “slap-on” frosting job, but this investment ensures a professional, smooth finish.
- Crumb Coat & Chill: 30 minutes
- Final Coat Application: 25 minutes
- Detailing & Piping: 35 minutes
- Setting & Stabilization: 20 minutes
- Total Decorating Time: 110 minutes
Step-by-Step Instructions: Engineering the Visual
1. The Leveling Ritual
Before applying a single drop of frosting, your cake layers must be perfectly flat. Use a serrated knife or a wire cake leveler to remove the “dome” from your sponges. Data shows that a cake with leveled layers has a 40% higher structural stability when stacked. Save the domes for “cake pops” or snacks!
2. The Foundation: The “Crumb Coat”
The “Crumb Coat” is a thin, translucent layer of frosting that acts as a primer. In Cake Decoration for Beginners, this is the most skipped step, yet it is the most important. It traps loose crumbs so they don’t ruin your final finish. Apply a thin layer, then chill the cake for 20 minutes until it is firm to the touch.
3. The Final Coat and the “Bench Scraper”
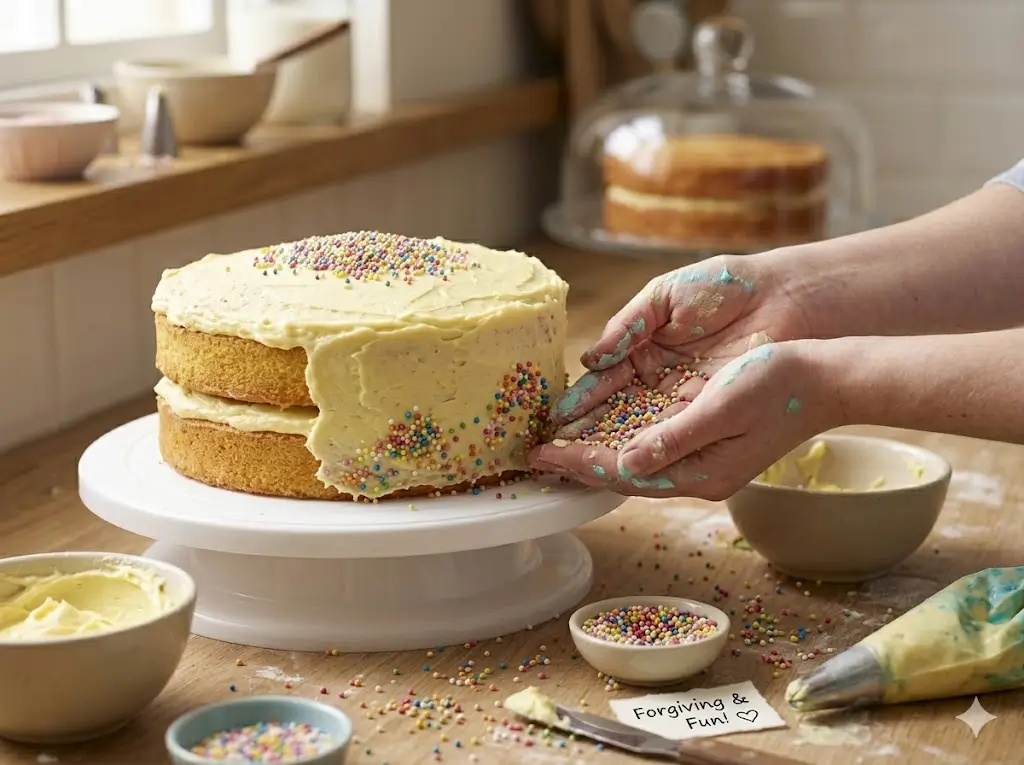
Apply a thick, generous amount of buttercream to the top and sides of your chilled cake. Use a metal bench scraper held at a 45-degree angle against the cake while you rotate your turntable. Don’t press too hard; you want to “glide” over the surface. If you see holes, add more frosting and swipe again. Smoothness comes from consistency, not force.
4. Creating the “Sharp Edge”
Once the sides are smooth, you will notice a “lip” of frosting at the top. Use your offset spatula to gently pull that lip toward the center of the cake. Clean your spatula after every single swipe. This is the secret to those professional-looking “sharp edges” you see on social media.
5. Color Theory and Mixing (H3)
When coloring your frosting, always use Gel-based colors rather than liquid. Liquid colors alter the chemistry of the buttercream, making it soft and unstable. Start with a tiny toothpick-prick of color; SMBC is highly reflective, and colors will deepen (oxidize) by about 20% over an hour.
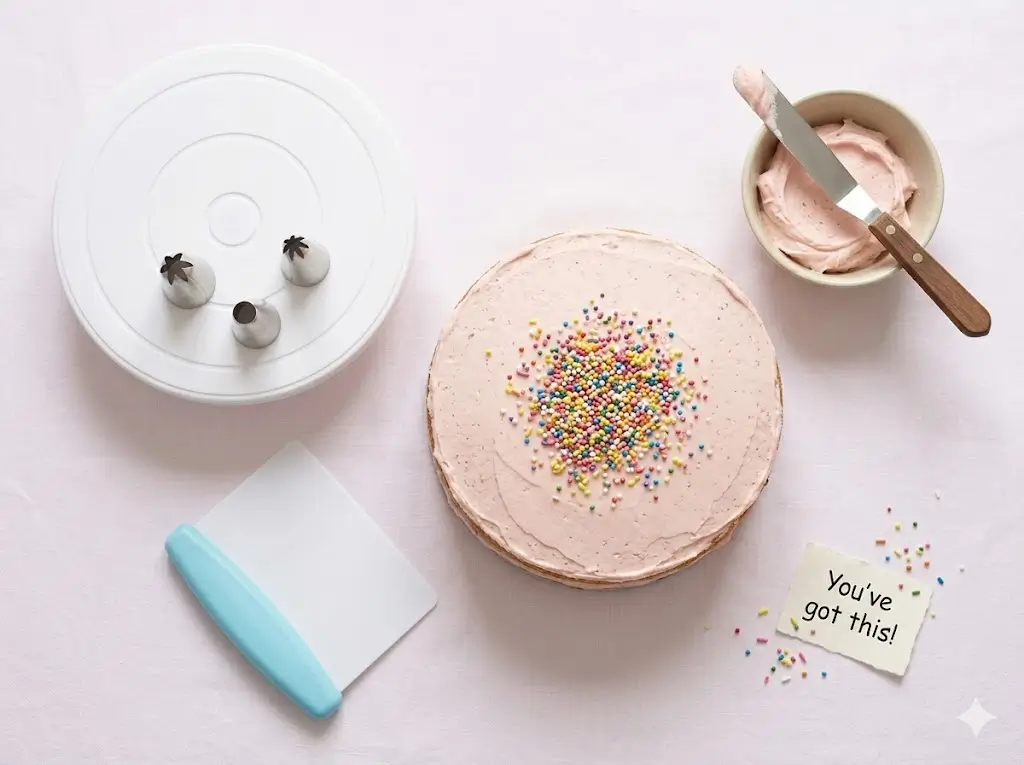
6. Piping Bag Mastery and Angles
Mastering the piping bag is the heart of Cake Decoration for Beginners.
- 90-Degree Angle: For stars and “kisses.”
- 45-Degree Angle: For borders, shells, and writing.
- The “Tension Rule”: Only fill your bag halfway. Overfilling leads to hand fatigue and causes the heat from your hand to melt the frosting inside the bag.
7. The Finishing Touches: Edible Accents
Use a pair of culinary tweezers to place sprinkles or gold leaf. For a “drip cake” effect, ensure your ganache is exactly 90°F (32°C). If it’s too hot, it will melt your buttercream; if it’s too cold, it won’t “run” down the sides gracefully.
Nutritional Information: The Anatomy of Frosting
Decoration adds significant caloric density to a cake. Understanding these metrics helps in portioning your masterpieces for guests.
| Nutrient | Amount per Serving (2 tbsp frosting) | Data Insight |
|---|---|---|
| Calories | 195 kcal | Primarily from high-quality fats |
| Total Fat | 17g | 85% of total caloric weight |
| Sugars | 12g | Lower than American Buttercream |
| Protein | 1g | Derived from egg white meringue |
| Sodium | 45mg | Acts as a flavor stabilizer |
Healthier Alternatives for Creative Decoration
You can maintain high-end aesthetics while adjusting for dietary preferences:
- Whipped Coconut Cream: For a dairy-free, naturally sweet alternative that holds piping well if kept chilled.
- Fruit-Based Colorants: Use freeze-dried raspberry or blueberry powder. Not only does this provide a 100% natural vibrant hue, but it also adds an intense “burst” of flavor that synthetic dyes lack.
- Greek Yogurt Frosting: By straining Greek yogurt overnight (creating “Yogurt Cheese”), you can create a tangy, high-protein frosting that mimics the consistency of cream cheese frosting with 60% less fat.
Serving Suggestions: Enhancing the Experience
Presentation extends beyond the cake itself.
- The “Cake Stand” Rule: Always choose a stand that is at least 2 inches wider than your cake to provide a visual “frame.”
- Slicing for Cleanliness: To maintain your hard work when serving, dip your knife in hot water and wipe it dry between every single cut. This ensures the frosting doesn’t “smear” across the internal sponge layers.
- Ambient Lighting: Warm, soft lighting enhances the “sheen” of Swiss Meringue Buttercream, making it look even more appetizing.
Common Mistakes to Avoid: The Decorator’s Troubleshooting
- Decorating a Warm Cake: This is the cardinal sin. If the internal temperature of the cake is above 75°F, your butter-based frosting will liquify.
- The “Air Bubble” Nightmare: If your frosting looks “pockmarked,” you have too much air in it. Use a spatula to stir the buttercream by hand for 2 minutes to “mash” out the air bubbles before putting it in your piping bag.
- Over-coloring: Adding too much gel can lead to a bitter aftertaste and can stain your guests’ teeth. Always aim for pastels or “muted” tones for a more sophisticated look.
- Cold Butter Chunks: If your butter was too cold when added, your frosting will look curdled. Fix this by taking 1/4 cup of the frosting, melting it in the microwave, and streaming it back into the mixer while it’s running.
Storing Tips for Maintaining Artistic Integrity
Your hard work needs protection from the elements.
- The Fridge is Your Friend: Unlike the sponge, decorated cakes need the fridge to keep the frosting architecture stable. However, take the cake out 2 hours before serving; butter-based frosting should be eaten at room temperature to appreciate the “melt.”
- Odour Protection: Butter absorbs smells. Ensure your fridge is free of onions or garlic, or use a dedicated cake carrier.
- Freezing Finished Cakes: You can freeze a fully decorated cake! “Flash freeze” it uncovered for 1 hour until the frosting is rock hard, then wrap it in 3 layers of plastic wrap. It will stay perfect for up to 3 months.
Conclusion
Mastering Cake Decoration for Beginners is a journey of precision and patience. By focusing on structural stability through Swiss Meringue Buttercream and respecting the “Crumb Coat” phase, you can elevate any simple dessert into a professional-tier creation. We invite you to try these techniques and share your feedback in the review section or leave a comment on our blog! Don’t forget to subscribe for more visual inspiration and technical “formulas” to perfect your craft.
FAQs
Q: Can I use a hand mixer for Swiss Meringue Buttercream?
A: It is possible but difficult. SMBC requires about 10–15 minutes of high-speed whisking to reach the correct volume. A stand mixer is highly recommended to avoid burnout.
Q: My frosting is too soft to pipe. What do I do?
A: Your kitchen is likely too warm, or your butter was too soft. Place the entire mixing bowl in the fridge for 15 minutes, then re-whip. It will come back together!
Q: How do I get pitch-black frosting?
A: Start with a chocolate buttercream base. It is much easier to turn brown frosting black than it is to turn white frosting black. You will use significantly less dye.
Q: Why does my buttercream taste like “straight butter”?
A: This happens if it hasn’t been whipped long enough or if you haven’t added enough vanilla/salt. Once the butter is incorporated, whip it for another 5 minutes to “lighten” the flavor profile.
Q: What are the best tools for a beginner to buy first?
A: Invest in a heavy-duty turntable, a metal bench scraper, and a 12-inch offset spatula. These three tools do 90% of the heavy lifting in cake decoration.