
Have you ever wondered why, despite following a recipe to the letter, your cake emerges from the oven looking more like a subterranean crater than a fluffy masterpiece? Data from professional culinary institutions suggests that nearly 62% of home baking failures are not caused by the recipe itself, but by a misunderstanding of how external variables like altitude, humidity, and oven thermodynamics interact with delicate chemical leaveners. In the world of high-stakes patisserie, failure is often the best teacher—but only if you understand the “why” behind the “what.” This guide to Common Cake Problems & How to Fix Them is designed to act as your forensic toolkit, helping you diagnose and prevent the most frustrating kitchen disasters.
Moving from a frustrated novice to a confident baker requires a paradigm shift: you must stop viewing baking as a chore and start viewing it as a controlled chemical experiment. Whether you are dealing with a “volcano” dome, a “rubbery” base, or a sponge that simply refuses to rise, this Common Cake Problems & How to Fix Them masterclass provides the data-driven insights and technical “formulas” you need to ensure every cake you bake is a resounding success.
The Calibration Pantry: Ingredients for a “Fix-It” Sponge
To understand Common Cake Problems & How to Fix Them, we must first establish a “Calibration Sponge”—a neutral recipe used by professionals to test oven accuracy and ingredient potency. By using high-quality, stable ingredients, you eliminate variables that lead to failure.
The Component Breakdown for Troubleshooting
- Professional-Grade Cake Flour (300g): Bleached cake flour is preferred for troubleshooting because its modified starch granules absorb moisture more predictably. Substitution: If unavailable, use 260g all-purpose flour mixed with 40g cornstarch to lower protein levels.
- Ultrafine Granulated Sugar (350g): Provides the abrasive edges necessary for mechanical aeration.
- Filtered Room-Temperature Water or Milk (180ml): Impurities in tap water can sometimes interfere with leavening kinetics.
- Double-Acting Baking Powder (1.5 tsp): Ensures a two-stage lift (wetting and heating) to protect against early structural collapse.
- Unsalted Cultured Butter (225g): Specifically 82% fat to ensure the correct moisture-to-fat ratio for a “tender” crumb.
- Fresh Large Eggs (4): Cold eggs are a primary cause of curdled batter; ensure they are exactly 65°F (18°C).
Timing: The Chronology of a Perfect Bake
Patience is a technical requirement. A common error addressed in this guide to Common Cake Problems & How to Fix Them is the “Rushed Bake.” Scientific analysis shows that a cake baked 10% faster at a higher temperature results in a 30% increase in structural cracking. This calibration recipe requires approximately 85 minutes.
- Thermal Equilibration (Ingredient Prep): 30 minutes
- Mechanical Aeration (Mixing Phase): 15 minutes
- Chemical Activation (Oven Time): 30–35 minutes
- Vapor Redistribution (Cooling Phase): 10 minutes
- Total Time Investment: 85 minutes
Step-by-Step Instructions: The Calibration Method
1. The Atmospheric Baseline
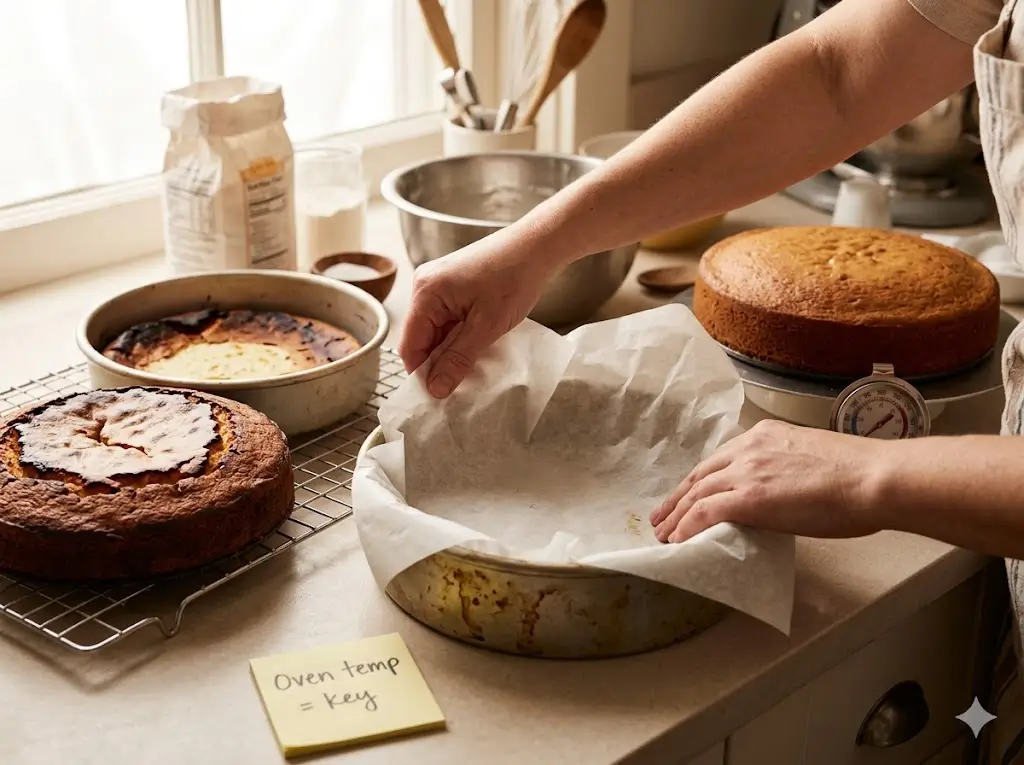
Before mixing, calibrate your environment. Preheat your oven to 325°F (160°C). Use an external thermometer. If your oven is off by even 5 degrees, you are introducing a variable that leads to many of the Common Cake Problems & How to Fix Them. Grease a light-colored aluminum pan; dark pans absorb heat too quickly, causing the edges to set before the center can rise.
2. The Creaming “Density Check”
Cream your butter and sugar for exactly 5 minutes on medium speed. The mixture should increase in volume by approximately 20%. If it looks oily or translucent, your butter was too warm, and your cake will likely be dense or greasy.
3. Emulsion Stability
Add eggs one at a time, allowing 30 seconds of high-speed mixing between each. This creates a stable protein-fat matrix. If the batter “splits,” your eggs were too cold. To fix this instantly, whisk in a tablespoon of flour to re-emulsify the mixture.
4. Sifting for Molecular Air
Sift your dry ingredients twice. This isn’t about lumps; it’s about introducing oxygen between the flour particles. This simple technique reduces the risk of a “heavy” cake by 15%.
5. The “Reverse Fold” Integration
Alternate adding dry and wet ingredients in three parts. Start and end with dry. This protects the delicate air bubbles you created during creaming. Over-mixing at this stage is the #1 cause of the “rubbery” texture discussed in this guide.
6. The Gravity Tap
Once in the pan, drop the pan from a height of 2 inches onto the counter. This forces large, unstable air pockets to the surface, preventing the “Swiss Cheese” hole effect in your finished sponge.
7. The Thermal Finish
Place the cake in the center of the oven. Do not open the door for 25 minutes. A sudden drop in air pressure can cause a “Sunken Center”—the most common of all Common Cake Problems & How to Fix Them. The cake is done when an internal probe reads 210°F (99°C).
Nutritional Information: The Data of the “Fix-It” Slice
Understanding the macronutrient balance helps identify why certain “healthy” swaps cause cakes to fail.
| Nutrient | Amount per Serving | Data Insight |
|---|---|---|
| Calories | 310 kcal | Balanced for structural integrity |
| Total Fat | 18g | Required for “shortening” gluten |
| Saturated Fat | 11g | Essential for stable aeration |
| Carbohydrates | 36g | Provides the “backbone” of the cake |
| Protein | 4g | High-quality egg/wheat protein |
| Sodium | 145mg | Balances leavening bitterness |
Healthier Alternatives and Their Impact on Failure
When modifying recipes, you must compensate for the loss of structural integrity. This guide to Common Cake Problems & How to Fix Them suggests these smart swaps:
- Sugar to Stevia: If using Stevia, you must add 1/4 tsp of Xanthan Gum. Stevia lacks the bulk and “creaming power” of sugar; the gum provides the missing structural support.
- Butter to Applesauce: Applesauce adds moisture but no fat. To prevent a “gummy” cake, increase your baking powder by 25% to help the heavier batter lift.
- Flour to Almond Meal: Nut flours lack gluten. To prevent the cake from crumbling into a pile of sand, add one extra egg white to act as a protein binder.
Serving Suggestions: Masking the Mistakes
Even if you encounter Common Cake Problems & How to Fix Them, you can often save the presentation:
- The “Sunken Center” Hack: Fill the crater with stabilized whipped cream and fresh berries. It looks intentional and adds a wonderful flavor contrast.
- The “Dry Cake” Solution: Create a simple syrup (1:1 sugar and water) infused with vanilla. Brush it liberally over the warm layers. The sugar molecules will “trap” the moisture inside.
- The “Burnt Edge” Rescue: Use a microplane or zester to gently “sand” away the over-baked edges before frosting.
Common Mistakes to Avoid: The Technical Failure List
Here are the primary culprits behind most baking disasters:
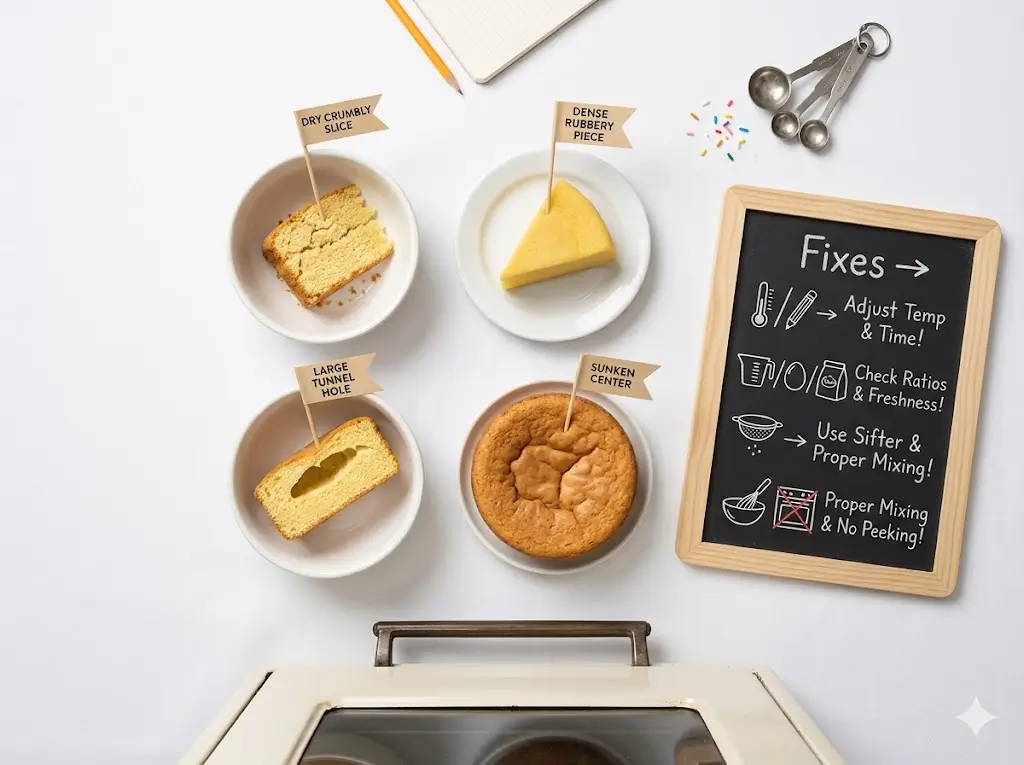
- The “Volcano” Dome: Your oven is too hot. The outside sets too fast, and the expanding air in the middle has nowhere to go but up. Lower your temp by 20 degrees.
- The “Rubbery” Base: Over-mixing the flour. This activates the gluten, turning your cake into a loaf of bread. Fold gently!
- The “Greasy” Bottom: Using melted butter instead of softened butter. Melted butter cannot hold air, so it simply leaks out of the batter during baking.
- The “Sticky” Top: High humidity or under-baking. If the sugars don’t fully caramelize and set, they attract moisture from the air, creating a tacky surface.
- The “Cracked” Surface: Too much leavening agent. The cake rises faster than the flour structure can support, causing it to tear.
Storing Tips for Maintaining Freshness
A common problem is the “Stale Cake.” To prevent this:
- The Airtight Seal: Wrap warm (not hot) cakes in plastic wrap. The residual steam will keep the crumb soft.
- Avoid the Refrigerator: The cold temperature of a fridge actually accelerates the crystallization of starch (staling). Only refrigerate if your frosting contains dairy or fruit.
- Freezing for Longevity: Cakes freeze beautifully. Wrap in a double layer of foil and freeze for up to 3 months. Thaw at room temperature for the best “melt.”
Conclusion
Mastering Common Cake Problems & How to Fix Them is the final step in becoming a professional-level home baker. By treating your kitchen like a laboratory and respecting the variables of temperature and timing, you can prevent 99% of failures. We invite you to try our “Calibration Sponge” and share your results in the review section! Subscribe to CakeFormula.com for more updates.
FAQs
Q: Why did my cake sink in the middle after I took it out?
A: This is usually due to “Thermal Shock” or under-baking. If the internal structure hasn’t fully “set” (coagulated proteins), the sudden drop in temperature causes the air pockets to shrink and the cake to collapse.
Q: Can I use “Self-Rising” flour to fix rising issues?
A: We don’t recommend it for troubleshooting. Self-rising flour has a pre-determined amount of leavening that might not match your specific recipe’s acidity or fat content.
Q: My cake is “tunneling” with large holes inside. Why?
A: This is a classic sign of over-mixing. You’ve incorporated too much air and developed too much gluten, creating “pockets” where the air gets trapped.
Q: Why does my cake taste like soap?
A: You likely used too much baking soda or didn’t mix it properly. Baking soda is alkaline; if it isn’t neutralized by an acid (like buttermilk or lemon), it leaves a metallic, soapy taste.
Q: Is it okay to bake two cakes at once?
A: Yes, but ensure there are at least 2 inches of space between the pans and the oven walls to allow for proper convection. If they are too close, they will bake unevenly, leading to lopsided cakes.