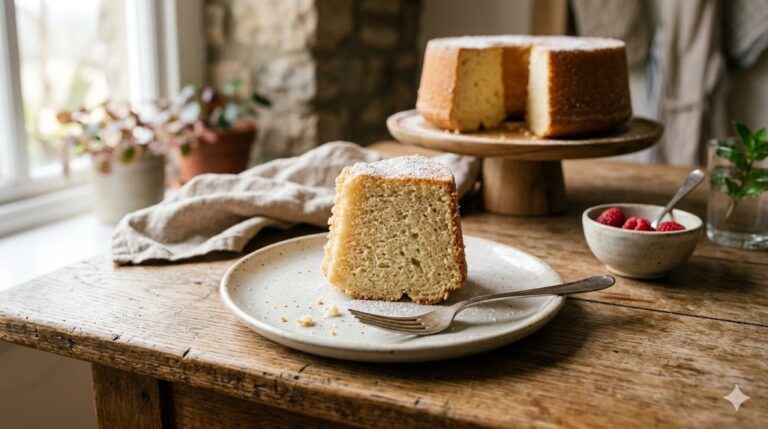
Mastering the Traditional Pound Cake 5 Best Secrets
Did you know that the original recipe from the 1700s called for exactly one pound each of flour, butter, eggs, and sugar, resulting in a staggering four-pound loaf of dessert? This fascinating historical data point challenges our modern reliance on chemical leaveners, proving that traditional aeration and technique are paramount to baking success. Welcome to our ultimate guide on Mastering the Traditional Pound Cake. In this detailed exploration, we will uncover the delicate science of butter emulsification and the straightforward techniques needed to master this rich, velvety, and deeply comforting dessert. Whether you are a complete novice diving into baking cakes for beginners or an experienced pastry chef looking to perfect your crumb, creating a flawless, golden crust with a dense yet melt-in-your-mouth interior is entirely within your reach.
Quick Answer
For the perfect traditional pound cake, cream room-temperature butter and sugar together for 5 to 7 minutes until pale and fluffy. Gradually add room-temperature eggs one at a time to build a stable emulsion, then gently alternate adding sifted dry ingredients and wet ingredients. Bake in a heavily greased and floured bundt or loaf pan at 325°F (163°C) until a wooden skewer comes out clean.
Ingredients List
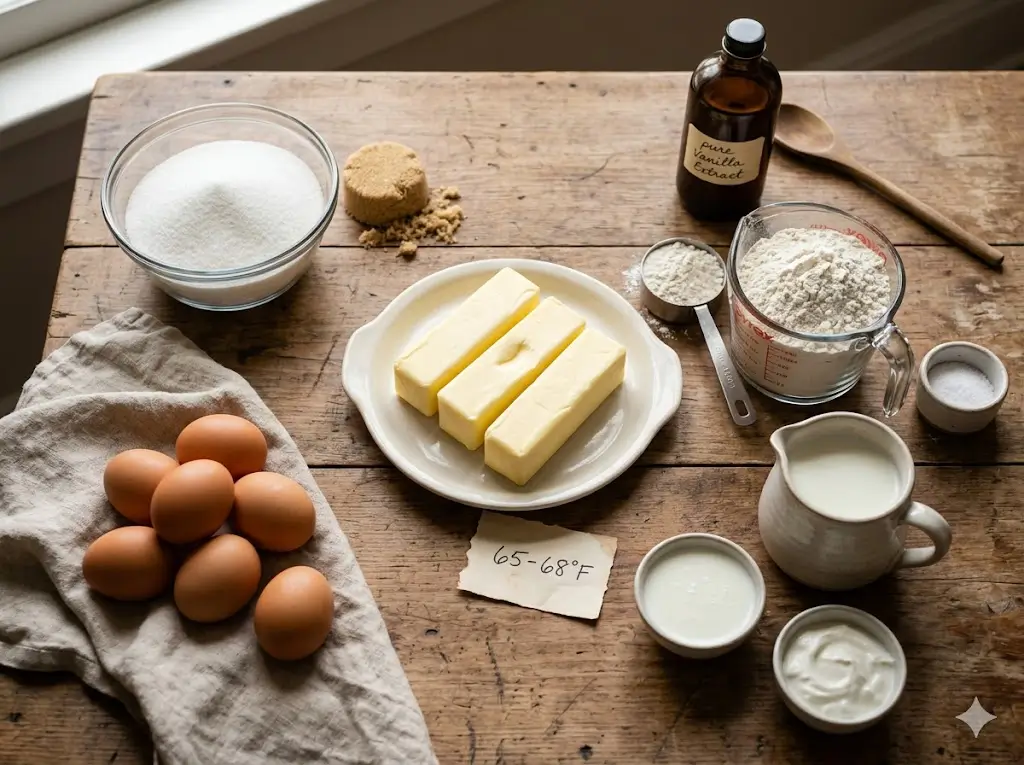
Creating a perfectly dense, moist, and buttery dessert requires a precise balance of specific foundational ingredients. Understanding the role of your components is the first critical step in mastering the cake ingredients guide and science of baking.
- 1 ½ cups (3 sticks) Unsalted Butter: This is the absolute backbone of your cake. It must be a high-quality butter, and crucially, it must be at true room temperature (around 65°F to 68°F). It should yield slightly to a gentle press but not look greasy or melted. Substitution: If you only have salted butter, omit the additional salt in the recipe.
- 3 cups Granulated Sugar: The sugar does more than just sweeten; its sharp crystals physically punch microscopic air pockets into the butter during the creaming process. This provides the primary leavening for the cake. Substitution: For a slight caramel note, swap half a cup of granulated sugar for packed light brown sugar.
- 5 Large Eggs: Eggs act as the binder and provide additional liquid and fat. They absolutely must be at room temperature to prevent the butter emulsion from breaking.
- 3 cups All-Purpose Flour: A medium-protein flour provides the necessary structure to support the heavy butter and sugar without becoming tough. Substitution: For a slightly tighter crumb, you can use cake flour, but standard all-purpose yields the most traditional texture.
- ½ cup Whole Milk or Buttermilk: Adds essential moisture and helps tenderize the gluten. Substitution: Full-fat sour cream or plain Greek yogurt will add a wonderful tang and incredible moisture.
- 1 tablespoon Pure Vanilla Extract: Because there are so few ingredients, high-quality vanilla extract is essential for a rich, aromatic flavor profile.
- ½ teaspoon Fine Sea Salt: Enhances all the inherent flavors, balancing the intense sweetness and highlighting the buttery notes.
Timing
Baking a masterpiece requires patience, but the active preparation is surprisingly manageable once your ingredients are prepped. For those interested in how these timelines map to different desserts, explore cake baking formulas and ratios. Here is the breakdown of the time you will need to invest:
- Prep Time: 20 minutes (includes bringing ingredients to room temperature and measuring)
- Cook Time: 70 to 85 minutes
- Cooling Time: 60 minutes
- Total Time: 2 hours and 25 minutes
Data Insight: While the baking time takes over an hour, which is 30% longer than standard layer cakes, the low-and-slow baking process is exactly what creates the signature dense texture and irresistible caramelized crust.
Equipment to Baking This Recipe
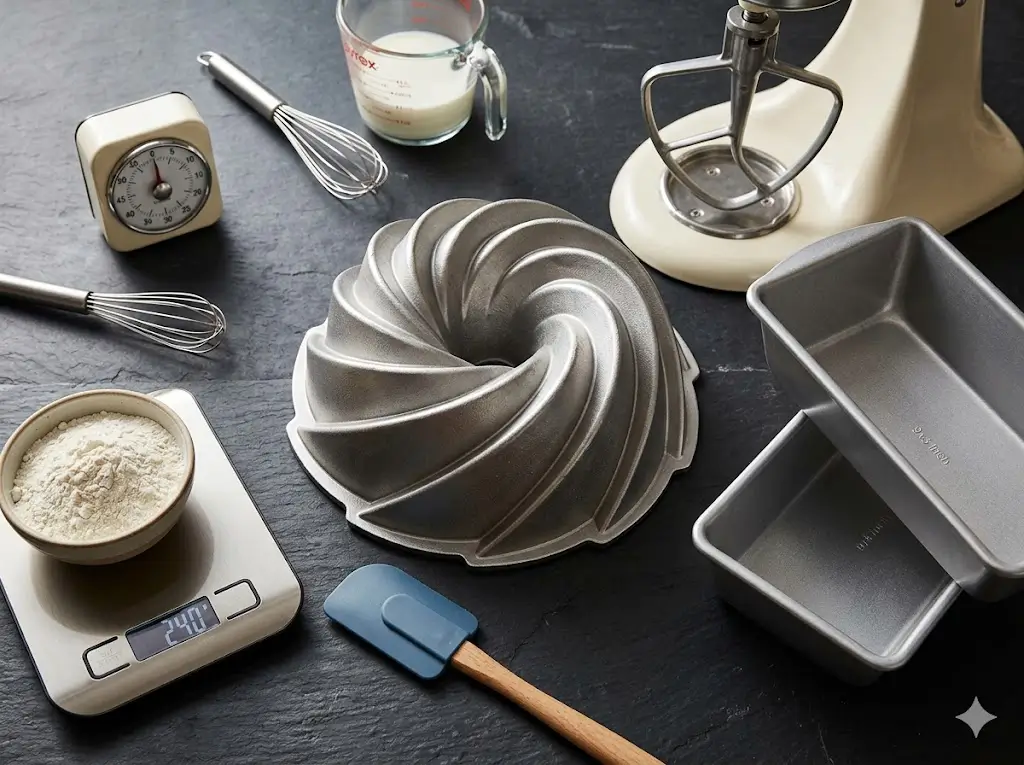
Having the correct, high-quality tools is non-negotiable for achieving the right texture and ensuring your cake releases perfectly. To dive deeper into essential kitchen gear, check out our comprehensive essential cake baking tools guide.
- 10-Inch Bundt Pan or Two 9×5 Loaf Pans: Heavy-cast aluminum pans are highly recommended as they conduct heat evenly, preventing the edges from burning before the center is cooked.
- Heavy-Duty Stand Mixer: While a hand mixer can work, a stand mixer fitted with a paddle attachment makes the extensive 7-minute creaming process effortless.
- Digital Kitchen Scale: For the most accurate and consistent results, weighing your flour and sugar is vastly superior to using measuring cups.
- Silicone Spatula: Essential for scraping down the sides and bottom of the mixing bowl to ensure a homogenous batter.
Step-by-Step Instructions
Follow these detailed instructions carefully to incorporate the best cake baking tips and techniques into your baking routine. Proper technique is just as important as the recipe itself.
Step 1: Pan Preparation and Preheating
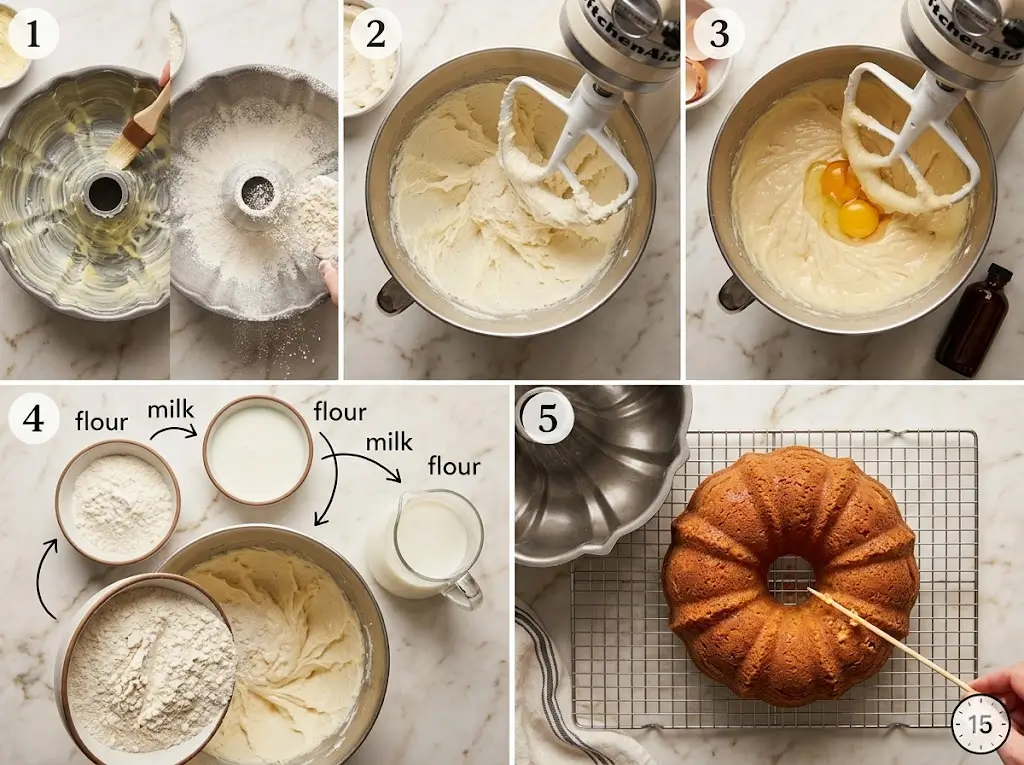
Begin by preheating your oven to 325°F (163°C). A lower temperature ensures the dense batter bakes evenly without the outside burning. Next, meticulously prepare your baking pan. Do not just lightly spray it. Generously brush the inside of your bundt pan with softened shortening or softened butter, ensuring you get into every single crevice. Then, add a few tablespoons of flour, rotating and tapping the pan until the inside is completely coated. Tap out any excess flour.
Step 2: The Crucial Creaming Process
In the bowl of your stand mixer fitted with the paddle attachment, place your room-temperature butter. Beat it on medium speed for 1 minute until smooth. Gradually pour in the granulated sugar. Once the sugar is added, increase the speed to medium-high and let the mixer run for a full 5 to 7 minutes. Do not rush this step! The mixture should transform from a dense yellow paste into a fluffy, pale ivory cloud. Stop the mixer twice during this process to scrape down the sides and bottom of the bowl with your silicone spatula.
Step 3: Emulsifying the Eggs
Reduce the mixer speed to medium-low. Begin adding the room-temperature eggs one at a time. It is crucial to let each egg fully incorporate into the batter before adding the next one. This takes about 30 seconds per egg. If you add the eggs too quickly, or if they are cold, the batter will curdle and separate, resulting in a heavy, greasy cake. Once all the eggs are incorporated, beat in the pure vanilla extract.
Step 4: Alternating Dry and Wet Ingredients
In a separate bowl, whisk together your flour and salt. With the mixer on the lowest possible speed, add one-third of the flour mixture to the butter mixture, mixing just until the flour disappears. Next, pour in half of your milk (or sour cream). Add the next third of the flour, followed by the remaining milk. Finally, add the last of the flour. Stop the mixer immediately once the last streak of flour is gone. Overmixing at this stage develops gluten, which will make your crumb tough and rubbery rather than velvety.
Step 5: The Perfect Bake and Cooling
Pour the thick batter into your prepared pan, using your spatula to smooth the top. Tap the pan firmly on the counter a few times to release any trapped air bubbles. Bake on the middle rack for 70 to 85 minutes. The cake is done when a wooden skewer inserted deep into the center comes out clean or with a few moist crumbs clinging to it. Remove the cake from the oven and let it cool in the pan on a wire rack for exactly 15 minutes—no more, no less. Invert the pan onto the wire rack, gently tapping the bottom if necessary, and carefully lift the pan away. Let the cake cool completely before slicing.
Nutritional Information
Traditional Pound Cake is undeniably a rich, indulgent treat, meant to be savored in sensible portions. Here is an overview of the nutritional profile per slice (assuming 16 slices per cake).
- Calories: 320 kcal
- Carbohydrates: 42g
- Protein: 4g
- Fat: 16g
- Saturated Fat: 10g
- Cholesterol: 95mg
- Sodium: 140mg
- Sugar: 26g
Data Insight: Because this recipe utilizes high-quality butter and eggs rather than synthetic shortenings, it provides natural sources of fat-soluble vitamins like Vitamin A and Vitamin D, making it a wholesome, albeit calorie-dense, option when enjoyed in moderation.
Healthier Alternatives for the Recipe
While the beauty of this classic lies in its rich ingredients, you can modify it to suit different dietary needs. If you want to explore how adjustments affect different baked goods, check out our complete guide to cake types.
- Reduced Saturated Fat: You can substitute half of the butter with a high-quality, unsweetened applesauce or mashed ripe bananas. This will alter the flavor profile slightly but significantly reduce the fat content while keeping the crumb moist.
- Whole Wheat Alternative: Swap up to half of the all-purpose flour for white whole wheat flour. This adds a nutty depth of flavor and increases the dietary fiber by over 40%, slowing down sugar absorption.
- Dairy-Free Modification: Substitute the butter with a high-quality vegan block butter (not a tub spread, as the water content is too high) and replace the whole milk with full-fat oat milk or almond milk.
Serving Suggestions
A beautifully baked slice is a wonderful blank canvas that pairs well with endless toppings. For foundational plating ideas, look into our cake decoration for beginners, or if you want to elevate your presentation, explore the advanced cake decorating guide.
- Summer Berry Compote: Simmer fresh strawberries, blueberries, and a splash of lemon juice until they break down into a syrupy compote. Spoon this generously over a thick slice. The acidity of the berries cuts through the rich butter flavor perfectly.
- Classic Vanilla Glaze: Whisk together powdered sugar, a splash of milk, and vanilla extract until smooth. Drizzle this heavily over the cooled cake for a beautiful bakery-style finish.
- Grilled with Peaches: Take a day-old slice, brush it lightly with melted butter, and grill it for one minute on each side until grill marks appear. Serve immediately with a scoop of vanilla bean ice cream and caramelized fresh peaches.
Common Mistakes to Avoid
Even the most seasoned bakers can occasionally stumble. If you encounter issues, consult our detailed troubleshooting guide on common cake problems and how to fix them. Here are the biggest pitfalls to avoid:
- Using Cold Ingredients: If your eggs or milk are cold, they will instantly solidify the softened butter when mixed. This breaks the emulsion, causing the batter to look curdled and resulting in a cake that is dense, flat, and greasy instead of fluffy.
- Under-Creaming the Butter and Sugar: Many bakers stop mixing after 1 or 2 minutes when the ingredients are just combined. You must beat them for a full 5 to 7 minutes to trap enough microscopic air bubbles to leaven the heavy batter.
- Opening the Oven Door Too Early: The structure of this heavy cake takes a long time to set. Opening the oven door during the first 45 minutes of baking lets out a massive rush of heat, which can cause the center of the cake to completely collapse.
Storing Tips for the Recipe
The high fat content from the butter makes this dessert exceptionally resilient when it comes to storage, actually improving in flavor on the second day.
- Room Temperature: Wrap the completely cooled cake tightly in plastic wrap, or place it under an airtight cake dome. It will stay incredibly moist and fresh at room temperature for up to 4 days.
- Freezing for Longevity: This cake freezes beautifully. Wrap the entire loaf (or individual, pre-cut slices) in a double layer of plastic wrap, followed by a tight layer of heavy-duty aluminum foil. Freeze for up to 6 months. To serve, simply thaw at room temperature for a few hours. Pro Tip: Avoid the refrigerator, as the circulating cold air alters the starch molecules and makes the crumb stale rapidly.
Conclusion
This classic dessert relies on precise creaming of room-temperature butter and sugar, careful egg emulsification, and a gentle folding of dry ingredients. By following these steps and avoiding overmixing, you can guarantee a dense, velvety, and moist crumb every time you bake.
Ready to fill your home with the incredible aroma of butter and vanilla? We invite you to try this recipe today! Share your baking success in the comment section below, leave a review, and subscribe to our blog for more tips. For even more inspiration, don’t miss our ultimate guide to cake recipes.
FAQs
1. Why did my cake stick to the bundt pan?
The most common reason is inadequate greasing, especially in pans with intricate designs. Always use a generous amount of shortening or butter, and ensure you flour the pan thoroughly, tapping out the excess. Also, ensure you do not leave the cake in the pan for more than 15 minutes after baking; as the sugars cool, they harden and act like glue.
2. Can I use a different flavored extract?
Absolutely. While vanilla is traditional, almond extract, lemon extract, or even a splash of dark rum or bourbon can add incredible depth of flavor. If using a strong extract like almond, start with just half a teaspoon.
3. Why does my cake have a hard, dark crust but is raw in the middle?
This indicates your oven temperature was too high. Ovens can often be wildly inaccurate. Invest in an inexpensive oven thermometer to ensure you are actually baking at 325°F (163°C). The dense batter needs a lower temperature for a longer period to cook through without burning the exterior.
4. What if I don’t have a stand mixer?
You can certainly use a handheld electric mixer. However, because hand mixers are generally less powerful, you may need to cream the butter and sugar for 8 to 10 minutes to achieve the proper pale, fluffy consistency required for aeration.
5. How do I know for sure when the cake is done?
Visual cues are helpful—the top should be deeply golden and slightly cracked—but the only reliable method is the skewer test. Insert a long wooden skewer into the thickest part of the cake. It should come out completely clean, or with just a few tiny, moist crumbs attached. If you see wet, shiny batter, it needs more time.

Mastering the Traditional Pound Cake 5 Best Secrets
Ingredients
Equipment
Method
Step 1: Pan Preparation and Preheating
Begin by preheating your oven to 325°F (163°C). A lower temperature ensures the dense batter bakes evenly without the outside burning. Next, meticulously prepare your baking pan. Do not just lightly spray it. Generously brush the inside of your bundt pan with softened shortening or softened butter, ensuring you get into every single crevice. Then, add a few tablespoons of flour, rotating and tapping the pan until the inside is completely coated. Tap out any excess flour.Step 2: The Crucial Creaming Process
In the bowl of your stand mixer fitted with the paddle attachment, place your room-temperature butter. Beat it on medium speed for 1 minute until smooth. Gradually pour in the granulated sugar. Once the sugar is added, increase the speed to medium-high and let the mixer run for a full 5 to 7 minutes. Do not rush this step! The mixture should transform from a dense yellow paste into a fluffy, pale ivory cloud. Stop the mixer twice during this process to scrape down the sides and bottom of the bowl with your silicone spatula.Step 3: Emulsifying the Eggs
Reduce the mixer speed to medium-low. Begin adding the room-temperature eggs one at a time. It is crucial to let each egg fully incorporate into the batter before adding the next one. This takes about 30 seconds per egg. If you add the eggs too quickly, or if they are cold, the batter will curdle and separate, resulting in a heavy, greasy cake. Once all the eggs are incorporated, beat in the pure vanilla extract.Step 4: Alternating Dry and Wet Ingredients
In a separate bowl, whisk together your flour and salt. With the mixer on the lowest possible speed, add one-third of the flour mixture to the butter mixture, mixing just until the flour disappears. Next, pour in half of your milk (or sour cream). Add the next third of the flour, followed by the remaining milk. Finally, add the last of the flour. Stop the mixer immediately once the last streak of flour is gone. Overmixing at this stage develops gluten, which will make your crumb tough and rubbery rather than velvety.Step 5: The Perfect Bake and Cooling
Pour the thick batter into your prepared pan, using your spatula to smooth the top. Tap the pan firmly on the counter a few times to release any trapped air bubbles. Bake on the middle rack for 70 to 85 minutes. The cake is done when a wooden skewer inserted deep into the center comes out clean or with a few moist crumbs clinging to it. Remove the cake from the oven and let it cool in the pan on a wire rack for exactly 15 minutes—no more, no less. Invert the pan onto the wire rack, gently tapping the bottom if necessary, and carefully lift the pan away. Let the cake cool completely before slicing.