Ingredients
Equipment
Method
Step 1: Prep the Pans and Preheat
Begin by preheating your oven to 350°F (175°C). Getting the oven to a perfectly stable ambient temperature is vital for the leavening agents to activate instantly. Grease your two cake pans generously with butter, line the bottoms with parchment paper rounds, and dust the sides lightly with flour.Step 2: Melt the Chocolate Perfectly
In a small, heat-proof bowl, break the 4 ounces of sweet baking chocolate into pieces. Pour the ½ cup of boiling water directly over the chocolate. Let it sit entirely undisturbed for 2 minutes to soften. Then, whisk it gently until it transforms into a completely smooth, glossy liquid. Set this aside to cool to room temperature.Step 3: Whisk the Dry Ingredients
In a medium mixing bowl, sift together the all-purpose flour, baking soda, baking powder, and fine sea salt. Sifting is mandatory—it aerates the dry ingredients and ensures the leavening agents are distributed perfectly evenly. For deeper insights into why precise measurements matter, check out our cake baking formulas and ratios guide.Step 4: Cream the Butter and Sugar
In the impeccably clean main bowl of your stand mixer fitted with the paddle attachment, beat the 1 cup of softened butter and 2 cups of granulated sugar on medium-high speed. Beat for a full 4 to 5 minutes until the mixture is pale yellow, light, and wonderfully fluffy. This crucial creaming step forces microscopic air bubbles into the fat, dictating the ultimate lightness of your crumb.Step 5: Emulsify Egg Yolks and Melted Chocolate
Reduce the mixer speed to medium-low. Add the 4 room-temperature egg yolks one at a time, ensuring each is fully incorporated before adding the next. Stop to scrape down the sides of the bowl with your silicone spatula. Next, blend in the 1 teaspoon of vanilla extract and the cooled, melted chocolate mixture until the batter is a beautiful, uniform light brown color.Step 6: Alternate Buttermilk and Flour
With the mixer on its lowest possible speed, add the sifted dry flour mixture in three parts, alternating with the room-temperature buttermilk in two parts (Flour -> Buttermilk -> Flour -> Buttermilk -> Flour). Mix only until you see the last stubborn streaks of dry flour disappear. Overmixing develops tough gluten, ruining the texture.Step 7: Fold in the Egg Whites
In a separate, perfectly clean glass or metal bowl, use your whisk attachment to beat the 4 egg whites until they reach stiff peaks. Carefully spoon the whipped egg whites into the main chocolate batter. Using your large silicone spatula, gently fold the whites in by scraping the bottom of the bowl and pulling the batter over the top. This technique adds immense volume and lift to the sponge.Step 8: Bake to Golden Perfection
Immediately divide the airy batter evenly between your two prepared pans. Smooth the tops with your offset spatula. Bake on the middle rack for 30 to 35 minutes. A wooden skewer inserted into the center should come out completely clean. Let the cakes cool in their pans for 15 minutes before turning them out onto wire racks to cool entirely.Step 9: Cook the Coconut Pecan Frosting
While the cakes cool, prepare the iconic filling. In a heavy-bottomed saucepan over medium heat, whisk together the evaporated milk, granulated sugar, beaten egg yolks, and ½ cup of butter. Cook, stirring constantly with a whisk or wooden spoon, for 10 to 12 minutes until the mixture thickens significantly and coats the back of a spoon. Remove from heat immediately. Stir in the vanilla, shredded coconut, and toasted pecans. Crucial: Let this frosting cool completely until it is thick and spreadable before trying to use it.Step 10: Assemble the Dessert
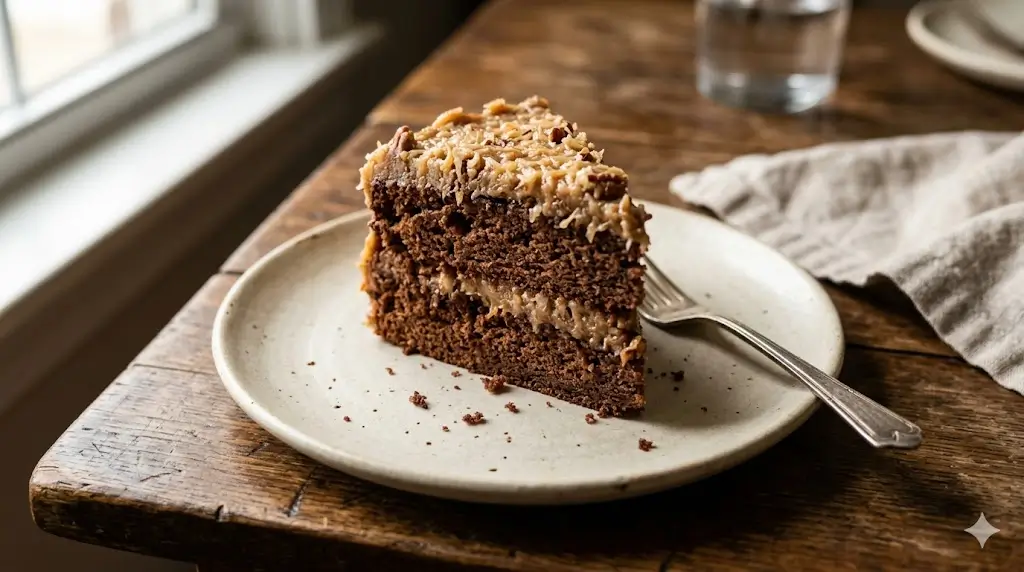
Once the cake layers and the frosting are both completely cool, place one layer on your serving platter. Spread a thick layer of the coconut-pecan frosting over the top, leaving a tiny border around the edge. Place the second layer on top, and pile the remaining frosting right in the center, gently coaxing it outwards. Traditional German Chocolate Cakes leave the sides bare, showcasing the beautiful layers! For more presentation ideas, look into cake decoration for beginners, or try piping chocolate rosettes around the borders using our advanced cake decorating guide.