Ingredients
Equipment
Method
Step 1: Whisk and Aerate the Dry Ingredients
Preheat your oven to 350°F (175°C). Generously grease your two 8-inch cake pans with butter or baking spray and line the bottoms with parchment paper. In a large mixing bowl, place your fine-mesh sieve over the top and sift together the all-purpose flour, Dutch-processed cocoa powder, granulated sugar, baking powder, baking soda, and fine sea salt. Whisking these together ensures a perfectly even distribution of the leavening agents, which prevents sunken cake centers. For those looking to master the exact science behind these precise ingredient alterations, reviewing cake baking formulas and ratios can drastically improve your foundational skills.Step 2: Prepare and Emulsify the Wet Ingredients
In a separate medium-sized bowl, combine the room-temperature eggs, buttermilk, vegetable oil, and vanilla extract. Whisk this mixture vigorously until all the wet ingredients are thoroughly combined and emulsified into a smooth, cohesive liquid. Emulsification is key to ensuring the fat distributes evenly through the crumb.Step 3: Combine Wet and Dry Elements Gently
Pour the wet buttermilk mixture directly into the center of the dry chocolate ingredients. Using your large silicone spatula or whisk, gently mix the batter together until it is about 80% combined. If you are new to the folding method and liquid batters, you might find our comprehensive resource on baking cakes for beginners highly beneficial for mastering these foundational mixing techniques.Step 4: Bloom the Cocoa with Hot Coffee
Pour the hot freshly brewed coffee (or hot water) carefully into the batter. Whisk slowly and gently until the batter is completely smooth and cohesive. The batter will seem incredibly thin and liquidy—do not panic! This high liquid content is exactly what creates the ultra-moist, fudgy texture. Mastering this delicate incorporation process is one of the many cake baking tips and techniques that permanently separate amateur home bakers from seasoned pastry professionals.Step 5: Bake the Chocolate Layers Perfectly
Divide the incredibly fragrant, dark batter evenly among the two prepared cake pans. Bake for 30 to 35 minutes, or until a toothpick inserted into the exact center comes out clean and the edges pull slightly away from the sides of the pan. Because oven temperatures vary, start checking closely at the 30-minute mark. Allow the cakes to cool in their pans for 15 minutes before carefully turning them out onto wire cooling racks to cool completely to room temperature.Step 6: Create the Fluffy Peanut Butter Frosting
While the cakes cool completely to room temperature, prepare your luxurious, salty-sweet frosting. In the bowl of your stand mixer, beat the softened butter and creamy peanut butter on medium-high speed until incredibly smooth, pale, and completely free of lumps (about 3-4 minutes). Reduce the speed to low and gradually add the sifted powdered sugar one cup at a time. Finally, add the vanilla extract, salt, and heavy whipping cream. Beat on high speed for an additional 3 minutes until the frosting is incredibly light, fluffy, and cloud-like.Step 7: Assemble and Garnish with Peanut Butter Cups
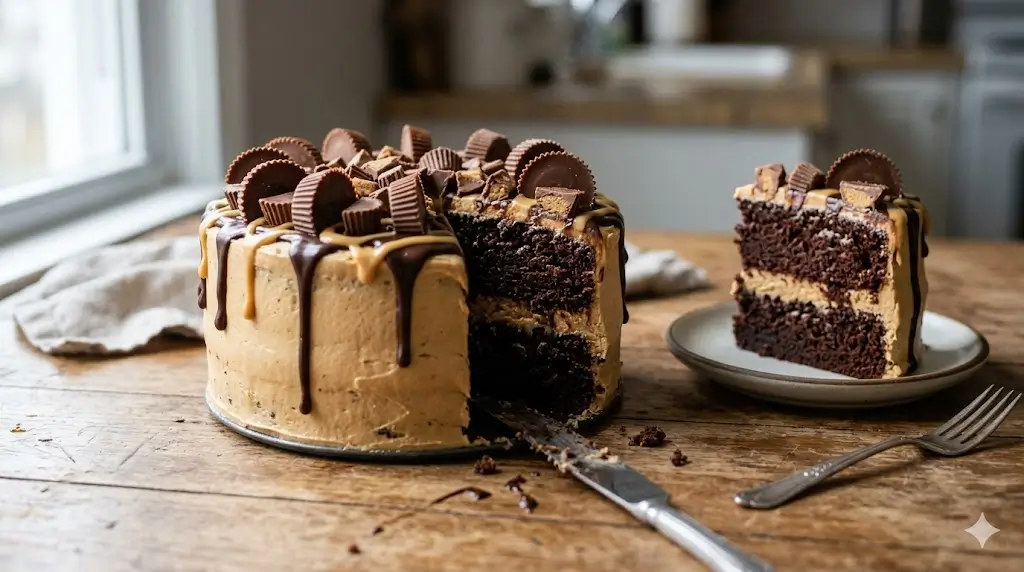
Level your completely cooled chocolate cake layers with a serrated knife so they stack neatly. Place the first layer on a decorative serving platter. Spread a thick, even 1/2-inch layer of the peanut butter frosting over the top. Place the second layer on top, face-down for a flawlessly flat top edge. Frost the entire outside of the cake. For those just starting out with smoothing frosting, checking a cake decoration for beginners guide can provide great confidence in achieving clean, sharp edges. Drizzle the dark chocolate ganache over the edges to create a drip effect, and immediately press the chopped peanut butter cups onto the top of the cake in a beautiful crown shape.