Ingredients
Equipment
Method
Step 1: Bake the Hazelnut Sponge Base
Preheat your oven to 350°F (175°C). Generously grease the bottom of your 8-inch springform pan and line it with a parchment paper round. In a medium mixing bowl, whisk together the melted butter and granulated sugar until well combined. Whisk in the room-temperature eggs one at a time, followed by the vanilla extract. Fold in the hazelnut flour, Dutch-processed cocoa powder, and sea salt until just combined into a thick, brownie-like batter. Pour the batter into the prepared pan and smooth the top. Bake for 18 to 22 minutes until the edges are set but the center remains slightly fudgy. Allow the sponge to cool completely in the pan. For those looking to master the exact science behind these dense sponge bases, reviewing cake baking formulas and ratios can drastically improve your foundational skills.Step 2: Bloom the Gelatin
While the sponge cools, prepare your gelatin. In a small bowl, sprinkle the powdered gelatin evenly over the 2 tablespoons of cold water. Do not dump it in a pile, or it will clump. Let it sit for 5 to 10 minutes to "bloom" (absorb the water and become rubbery).Step 3: Create the Chocolate Hazelnut Base
In a heat-proof bowl set over a saucepan of barely simmering water (a double boiler), combine the finely chopped semi-sweet chocolate, the hazelnut spread, and 1/2 cup of the heavy whipping cream. Stir gently until completely melted, smooth, and glossy. Remove from the heat. Microwave your bloomed gelatin for exactly 10 seconds until it turns into a clear liquid. Immediately whisk the liquid gelatin into the warm chocolate mixture until perfectly incorporated. Let this base cool to room temperature (it must not be warm when you add the whipped cream).Step 4: Whip the Cream and Fold the Mousse
In a large, chilled mixing bowl, whip the remaining 1 and 1/2 cups of cold heavy cream with the vanilla extract until soft peaks form. The cream should hold its shape but the tips should flop over. Do not whip to stiff peaks, or the mousse will be grainy. Using your large silicone spatula, gently fold one-third of the whipped cream into the cooled chocolate hazelnut base to lighten it. Then, gently fold the chocolate mixture into the remaining whipped cream using a delicate, sweeping bottom-to-top motion. Stop immediately when no white streaks remain. If you are new to aerating and folding delicate mixtures, you might find our comprehensive resource on baking cakes for beginners highly beneficial for mastering these foundational techniques.Step 5: Assemble and Chill
If using an acetate collar, slide it around the inside edge of the springform pan, resting between the cooled sponge base and the metal ring. Pour the luscious mousse directly over the cooled hazelnut sponge. Use an offset spatula to smooth the top perfectly flat. Tap the pan firmly on the counter twice to release any trapped air bubbles. Cover the pan tightly with plastic wrap and refrigerate for a minimum of 4 hours, or overnight, until the mousse is firm and completely set. Mastering this clean layering process is one of the many cake baking tips and techniques that permanently separate amateur home bakers from seasoned pastry professionals.Step 6: Create the Glossy Ganache
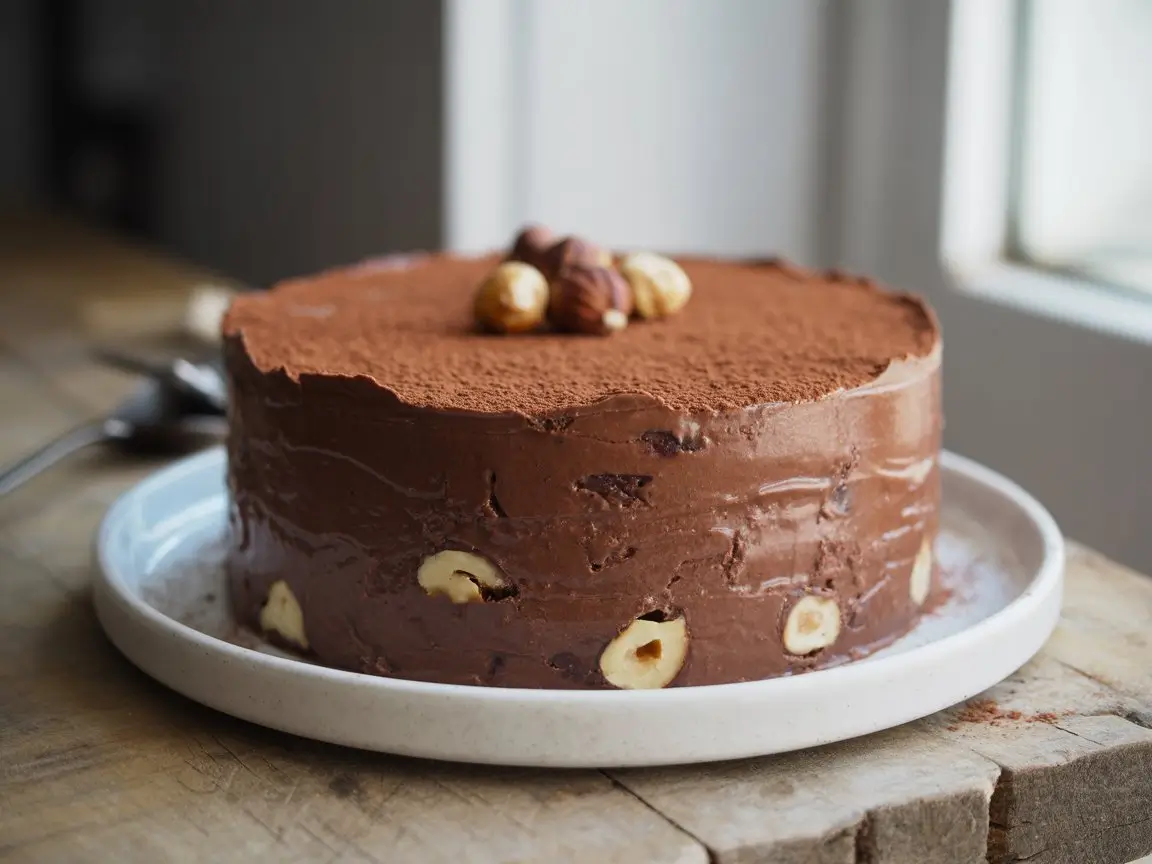
Once the mousse is entirely set, prepare the ganache topping. Place the chopped semi-sweet chocolate in a heat-proof bowl. In a small saucepan, heat the heavy cream just until it begins to simmer (do not boil). Pour the hot cream over the chocolate and let it sit completely undisturbed for 5 minutes. Gently whisk in small circles starting from the center until a dark, glossy ganache forms. For those just starting out with smooth glazes, checking a cake decoration for beginners guide can provide great confidence in achieving a beautiful, reflective finish.Step 7: Garnish and Serve
Pour the slightly cooled ganache over the set mousse cake while it is still in the springform pan. Tilt the pan gently to coat the entire surface in an even layer. Chill for another 30 minutes to set the ganache. To serve, carefully unbuckle the springform pan, peel away the acetate collar (if used) to reveal pristine layers, and garnish the outer edge heavily with toasted, chopped hazelnuts. If you want to elevate your presentation even further with elaborate chocolate shards or gold leaf, explore our advanced cake decorating guide to learn professional skills.