Ingredients
Equipment
Method
Step 1: Prepare the Dry Foundation
Preheat your oven to 350°F (175°C). Grease your three 8-inch cake pans and line the bottoms with parchment paper. In a large mixing bowl, whisk together the sifted all-purpose flour, Dutch-processed cocoa powder, baking powder, baking soda, salt, and granulated sugar. Whisking the dry ingredients thoroughly ensures an even distribution of leavening agents, which prevents a lopsided cake. For those looking to master the exact science behind these dry measurements, reviewing cake baking formulas and ratios can dramatically improve your foundational skills.Step 2: Create the Wet Emulsion
In a separate medium bowl, combine the room-temperature eggs, homemade buttermilk, vegetable oil, and vanilla extract. Beat these ingredients until fully incorporated. Pour the wet mixture into the dry ingredients and mix on low speed until just combined. Be careful not to overmix, as this develops gluten and leads to a dense texture. If you are new to folding batters, you might find our resource on baking cakes for beginners highly beneficial for mastering these gentle techniques.Step 3: Bloom the Cocoa and Bake
Carefully pour the boiling water into the batter, mixing slowly until the batter is smooth. The consistency will be quite thin, which is exactly what yields a moist, tender crumb. Divide the batter evenly among the three prepared pans. Bake for 30 to 35 minutes, or until a toothpick inserted into the center comes out clean. Allow the cakes to cool in their pans for 10 minutes before turning them out onto wire racks to cool completely.Step 4: Craft the Cherry Compote
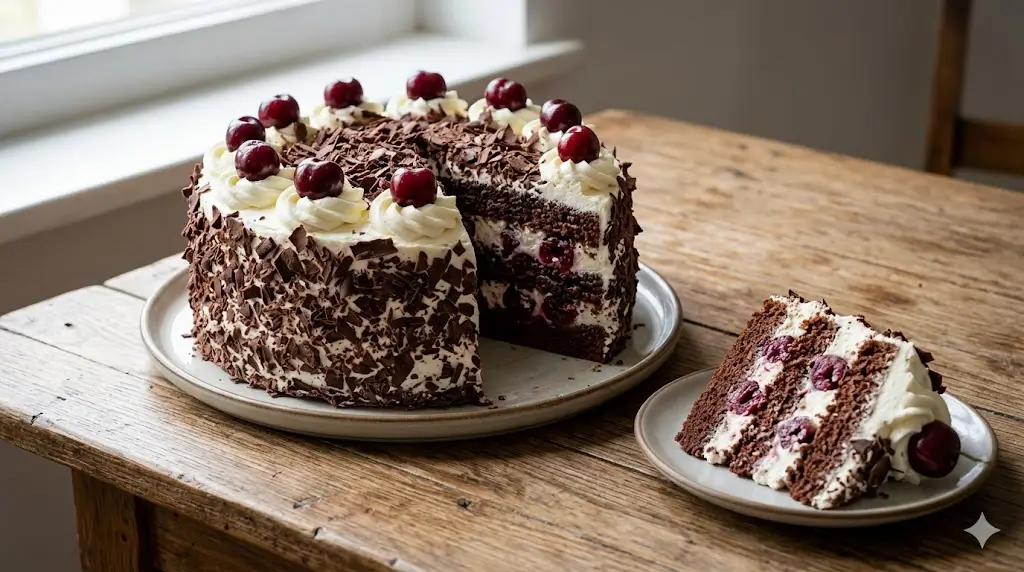
While the cakes are baking, prepare the iconic cherry filling. In a medium saucepan, whisk together the reserved 1/2 cup of cherry juice, sugar, and cornstarch until smooth. Place over medium heat and stir constantly until the mixture thickens and begins to bubble. Remove from heat, gently fold in the drained sour cherries, and stir in 2 tablespoons of the Kirschwasser. Let this mixture cool completely. It should be thick enough to stay in place between the cake layers without weeping.Step 5: Whip the Stabilized Cream
Place your mixing bowl and whisk attachment in the freezer for 10 minutes before starting. Pour the heavily chilled whipping cream into the cold bowl. Beat on medium speed until the cream begins to thicken. Gradually add the sifted powdered sugar and vanilla extract. For structural longevity, add a tablespoon of skim milk powder. Beat until firm peaks form. Be vigilant; over-beating will turn your cream into butter. Understanding the precise moment to stop whisking is one of the many cake baking tips and techniques that separate amateurs from pros.Step 6: Assemble the Layers
Level your cooled cake layers using a serrated knife. Place the first layer on your serving platter or cake stand. Brush the top generously with the remaining Kirschwasser to infuse the sponge with moisture and flavor. Pipe a border (a "dam") of whipped cream around the outer edge of the cake layer—this prevents the cherry filling from spilling out. Fill the center with half of the cooled cherry compote. Place the second cake layer on top and repeat the soaking, piping, and filling process.Step 7: Frost and Decorate
Top with the final cake layer and brush with the last bit of Kirschwasser. Generously frost the top and sides of the entire cake with the whipped cream. Use an offset spatula to create a smooth finish or a rustic, swooping texture, depending on your preference. For those just starting out, checking a cake decoration for beginners guide can provide great confidence. Press the dark chocolate curls onto the sides of the cake. Pipe decorative rosettes of whipped cream around the top border, placing a fresh cherry onto each rosette. To elevate your presentation even further, explore our advanced cake decorating guide.