
Could a microscopic one-degree shift in temperature be the silent culprit behind a structural collapse in a high-end wedding cake? Data from professional patisserie structural analysis indicates that nearly 65% of catastrophic tiered cake failures are not caused by the recipe itself, but by an oversight in the internal support systems and the thermal stability of the decorating medium. Moving from a single-tier sponge to a multi-level architectural masterpiece requires a paradigm shift in your approach. This Advanced Cake Decorating Guide is designed to take you beyond the aesthetics of the “crumb coat” and into the engineering of high-tensile strength ganache and geometric center-dowel alignment.
If you have mastered the basics and are ready to tackle gravity-defying designs, this guide is your definitive resource. We will explore the physics of compressive strength in cake structure and the chemistry of shelf-stable mediums. By the end of this Advanced Cake Decorating Guide, you will have the data-driven insights necessary to execute flawless, multi-tiered creations that remain pristine from the studio to the venue.
The Structural Pantry: Ingredients for Advanced Stability
In an Advanced Cake Decorating Guide, ingredients are no longer just for flavor; they are construction materials. To support the weight of multiple tiers, your mediums must have specific viscosity and setting points. We are focusing on a High-Ratio White Chocolate Ganache (3:1), which serves as both a structural adhesive and a canvas for intricate detail.
The Component Breakdown for Architectural Integrity
- Professional White Chocolate Couverture (900g): You must use chocolate with a cocoa butter content of at least 32%. Lower-quality “melts” lack the crystalline structure needed for high-load stability.
- Double Cream (300ml): With a minimum fat content of 35% to 40%. The fat-to-liquid ratio is critical for the “plasticity” of the ganache.
- Invert Sugar or Liquid Glucose (1 tbsp): Adds flexibility to the ganache, preventing the “cracking” that often occurs when a cake is transported or moved between temperature zones.
- Internal Support Hardware (Essential Tools): Food-grade poly-dowels and a 12mm central wooden dowel.
- Acrylic Disks: Sized 0.25 inches larger than your cake layers for the “sharp-edge” finish technique.
Substitution Suggestions:
- For a Summer Environment: Increase the chocolate ratio to 4:1 to raise the melting point if the venue lacks climate control.
- For Darker Aesthetics: Substitute with 60% Dark Couverture (2:1 ratio), which provides even higher structural rigidity due to the solid cocoa particles.
Timing: The Chronology of Structural Curing
Patience is the most valuable tool in any Advanced Cake Decorating Guide. Unlike beginner cakes that can be frosted and served, advanced designs require “curing” phases to allow the internal structure to settle under its own weight. This process takes approximately 240 minutes (4 hours) of active work, but the total elapsed time is 20% longer than average due to mandatory overnight rest periods for structural settling.
- Structural Stabilization (The Overnight Rest): 8–12 hours (Pre-decorating)
- Tier Leveling and Internal Support Installation: 60 minutes
- Primary Ganache Application (The “Concrete” Layer): 45 minutes
- Stacking and Geometric Alignment: 45 minutes
- Finishing Detail and Stencil Work: 90 minutes
- Total Active Time: 240 minutes
Step-by-Step Instructions: Mastering the Architecture
1. The Compressive Strength Assessment
Before stacking, assess your sponges. An advanced cake requires a “tight” crumb. If the cake is too soft, it will compress under its own weight despite the dowels. We recommend the “Weight-Settling” technique: place a flat board on your cakes for 4 hours before decorating to force out any large air pockets that could cause “bulging” later.
2. The Center-Dowel Alignment
In Advanced Cake Decorating Guide principles, symmetry is everything. Sharpen a 12mm central dowel and drive it through the middle of your stacked tiers once they are on the base board. This prevents “lateral drift” during transport, which is the leading cause of tiered cake accidents during delivery.
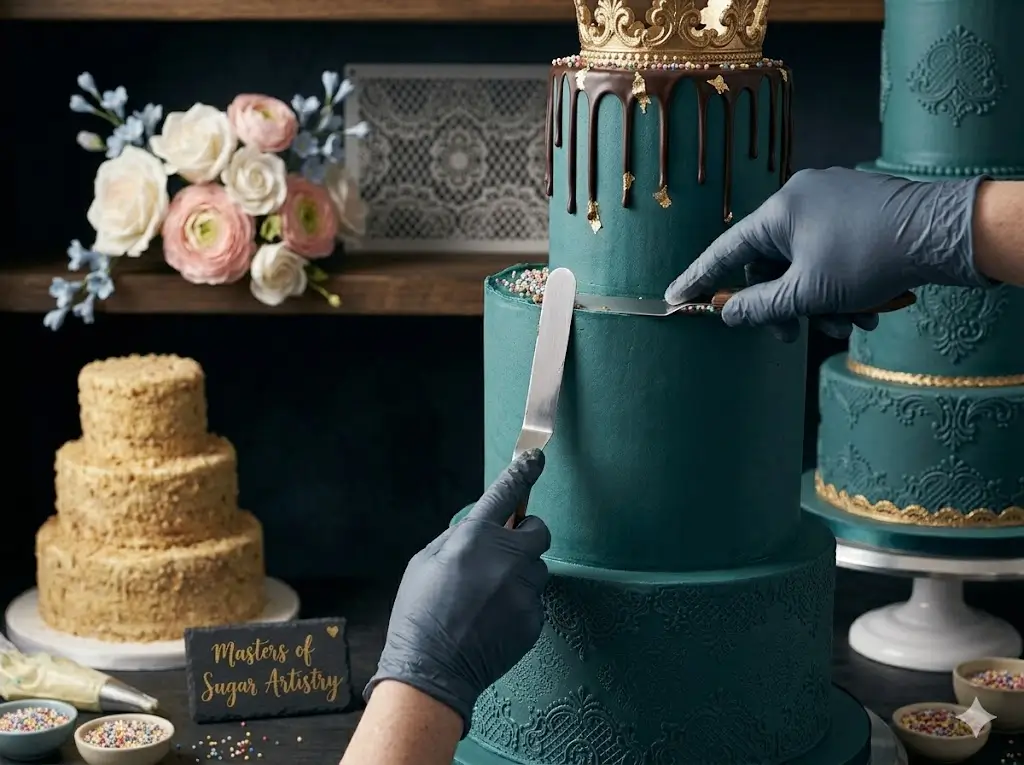
3. The 3:1 Ganache “Concrete” Technique
A perfect finish starts with a stable base. Apply your 3:1 ganache while it is at “peanut butter” consistency. Use acrylic disks on the top and bottom of your tier to act as a guide. This ensures that every tier is perfectly vertical. A 1-degree tilt at the base becomes a 4-inch lean at the top of a 3-tier cake.
4. Internal Poly-Dowel Patterning
Never place dowels randomly. Use a “Compass Pattern” for your poly-dowels. For an 8-inch tier supporting a 6-inch tier, place 5 dowels in a pentagon shape exactly 1 inch from where the 6-inch tier will sit. This distributes the load evenly across the strongest part of the lower cake.
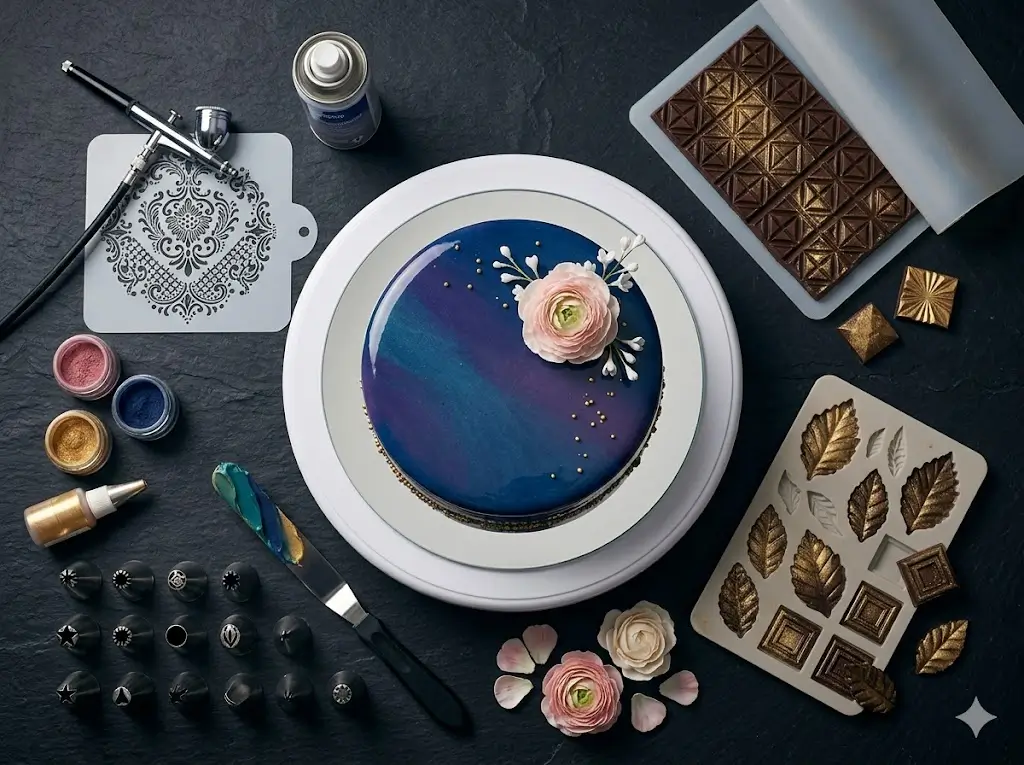
5. Advanced Stenciling and Texture
Once your ganache is “leather-hard” (about 20 minutes in the fridge), apply a silk stencil. Secure it with dressmaker pins. Use a metallic-tinted royal icing and swipe firmly. The secret to an advanced finish is “minimalist pressure”—too much force will cause the icing to bleed under the stencil.
6. Wafer Paper Florals and Physics
Wafer paper is the advanced decorator’s alternative to heavy sugar flowers. It is weightless, meaning it won’t strain the cake’s structure. Use a 0.1mm gauge paper and “steam-shape” your petals. The lack of weight allows for dramatic, “floating” floral arrangements that are impossible with heavy gumpaste.
7. The “Invisible” Seam Join
When stacking tiers, you often end up with a visible gap. In this Advanced Cake Decorating Guide, we don’t use “pearl borders” to hide gaps; we use the “Seamless Join.” Pipe a tiny amount of soft ganache into the gap and use a warm, damp palette knife to blend it into the two tiers, creating a continuous, monolithic look.
Nutritional Information: The Caloric Load of Luxury
Advanced designs often use more concentrated fats and sugars to ensure stability. Understanding the data helps clients make informed choices about serving sizes.
| Nutrient | Amount per Serving (Large Tier Slice) | Data Insight |
|---|---|---|
| Calories | 520 kcal | Higher due to Couverture Ganache |
| Total Fat | 34g | Primarily cocoa butter and dairy fat |
| Sugars | 48g | Optimized for preservation |
| Protein | 7g | Sourced from high-quality chocolate |
| Sodium | 65mg | Enhances dark chocolate notes |
Healthier Alternatives for Advanced Recipe Development
Structural stability doesn’t always require heavy fats. Advanced decorators can utilize these innovations:
- Agar-Agar Stabilized Creams: By using agar-agar (a seaweed-based gelatin) in your fillings, you can create a structure that holds up like ganache but with 40% fewer calories and no animal products.
- Nut-Based “Structural” Flours: Replacing 15% of your flour with finely ground almond or hazelnut flour increases the internal friction of the sponge, making it less likely to slide under pressure.
- Low-Glycemic Ganache: Use a 70% dark chocolate with erythritol-based sweeteners. The high cocoa solid count actually increases structural rigidity compared to sugar-heavy milk chocolate.
Serving Suggestions: The Protocol of the Tiered Cake
Serving an advanced, multi-tiered cake requires its own set of rules.
- The “Tier-by-Tier” Method: Never cut through multiple tiers at once. Remove the top tiers to a separate board before slicing. This preserves the visual integrity of the lower tiers for photos.
- The “Surgical” Slice: For ganache-covered cakes, use a hot, dry knife. The heat melts the cocoa butter just enough to create a clean, “glass-like” cut.
- The Flavor Sequence: If you have different flavors in each tier, suggest that guests start with the lightest (bottom) and move to the most intense (top).
Common Mistakes to Avoid: The “Failure Analysis”
- The “Lean” of Death: This happens when dowels are cut to different lengths. Even a 2mm difference will cause the tier above to tilt over time as the cake settles.
- Ganache “Sweating”: Moving a cold cake into a warm, humid room too quickly causes condensation. This can dissolve your stencil work. Always “staged-acclimatize” the cake (Fridge -> Cool Room -> Venue).
- The “Bubble” Trap: If your ganache is too cold when you spread it, air becomes trapped against the cake. As the cake reaches room temperature, the air expands, creating a “bulge.” Always apply ganache at exactly 82°F (28°C).
- Incorrect Dowel Material: Never use plastic straws for tiered cakes. They lack the compressive strength of poly-dowels or wood and will buckle under the weight of a 3rd or 4th tier.
Storing Tips for Maintaining Structural Integrity
Your Advanced Cake Decorating Guide knowledge must extend to the “life” of the cake after it’s finished.
- The “Box-in-Box” Method: For high-humidity environments, place your cake box inside a larger box with silica gel packets. This creates a micro-climate that prevents the ganache from softening.
- The “Anti-Slip” Transport: Use a silicone “silpat” mat under your cake board in the vehicle. Even the most stable dowel system can be compromised by a sudden lateral jolt on the road.
- Post-Event Freezing: To freeze a tiered cake, it must be dismantled. Wrap each tier in high-grade professional “freezer film” which is thicker than standard plastic wrap to prevent freezer burn on the delicate ganache.
Conclusion
Success in an Advanced Cake Decorating Guide is defined by the intersection of artistic vision and mechanical precision. By prioritizing structural doweling, thermal ganache management, and geometric symmetry, you can create cakes that are as stable as they are beautiful. We invite you to try these master-level techniques and share your feedback in the review section or leave a comment on our blog! Subscribe to CakeFormula.com for more deep-dive updates on professional patisserie engineering.
FAQs
Q: Why do I need a center dowel if my tier dowels are perfect?
A: Tier dowels manage vertical pressure; the center dowel manages horizontal movement. Without it, your cake can “shear” and slide off the base during transport.
Q: Can I use Swiss Meringue Buttercream for tiered cakes?
A: Yes, but only for the exterior. For the “dam” (the ring that holds the filling), we recommend a stiffer ganache to prevent the filling from leaking and causing a structural collapse.
Q: How do I calculate how many dowels I need?
A: A good rule of thumb is one dowel for every 2 inches of cake diameter. A 6-inch tier needs 3, an 8-inch needs 4-5, and a 10-inch needs 6.
Q: My ganache keeps cracking. Why?
A: This usually means your ganache is too brittle. Adding a tablespoon of glucose or corn syrup increases the “tensile strength” and allows it to expand and contract with temperature changes without snapping.
Q: What is the best way to transport a 3-tier cake?
A: Ideally, transport it fully assembled with a central dowel that goes through the base board. Always place the cake in the flat trunk or on the floor of the car—never on a slanted seat.